Remove OneDrive From Sidebar in Windows 10
While OneDrive is a convenient and easy to use Cloud storage service, you might be looking for a way to remove OneDrive from File Explorer Sidebar in Windows 10 due to the following reasons.
- You are using other Cloud Storage services like DropBox, Google Drive and others.
- You simply do not want to see the option to store files to OneDrive on your computer.
- You do not like to see OneDrive taking up space in Windows 10 File Explorer side menu. So, let us move ahead and take a look at two different methods to remove OneDrive from File Explorer Sidebar in Windows 10.
1. Uninstall OneDrive From Windows 10
The easiest way to remove OneDrive from File Explorer Sidebar in Windows 10 is to simply Uninstall the OneDrive App on your computer.
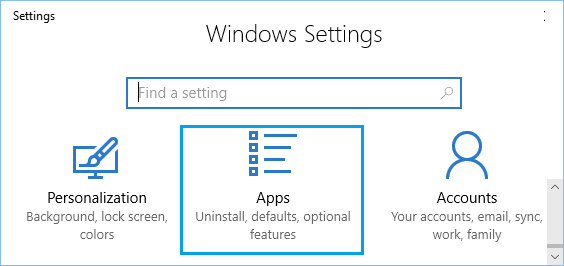
Open Settings on your computer.
On the Settings screen, click on the Apps tab.
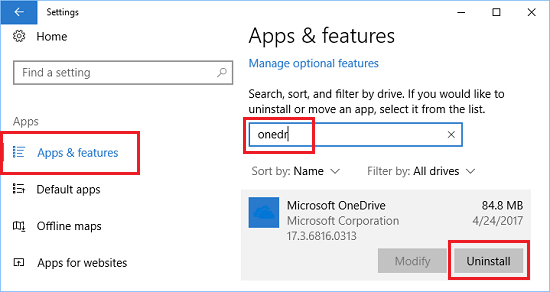
On the next screen, search for OneDrive > click on Microsoft OneDrive and click on the Uninstall option.
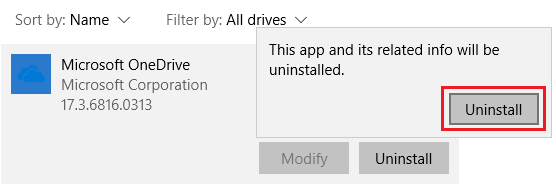
On the confirmation pop-up, click on Uninstall to confirm.
This will Uninstall the OneDrive App on your computer and it will be removed from the File Explorer Sidebar on your computer.
2. Remove OneDrive From Sidebar Using Registry
This option to remove OneDrive from the File Explorer Sidebar works on older computers. On newer computers, you may have a hard time trying to find the right Registry Key to modify.
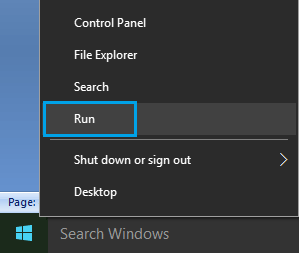
Right-click on the Start button and click on Run.
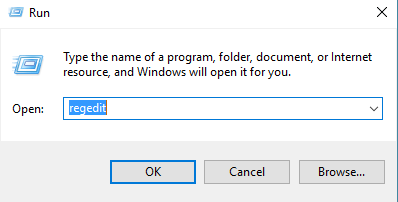
In the Run Command window, type regedit and click on OK.
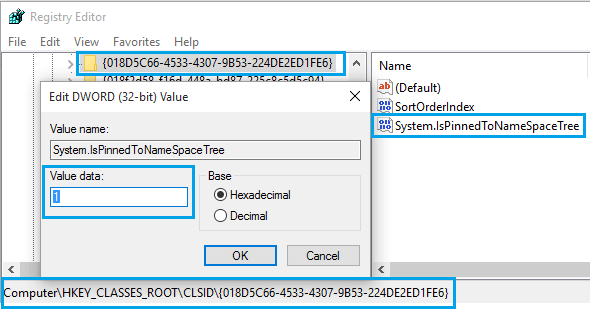
On the Registry Editor screen, open HKEY_CLASSES_ROOT Folder
In this Folder, navigate to CLSID{018D5C66-4533-4307-9B53-224DE2ED1FE6} Folder and click on it. In the right-pane, double-click on System.IsPinnedToNameSpaceTree entry.
On Edit DWORD pop-up, change Value Data from 1 to 0 and click OK to save this change (See above image). After this, you will no longer find OneDrive in the File Explorer Sidebar. Restart the computer, in case you still see OneDrive in the File Explorer Sidebar. It should be gone after you login back into your computer. By removing OneDrive from File Explorer Sidebar, you are basically getting it out of the way, so that you can focus on the Cloud storage service that you currently use.
3. Uninstall OneDrive Using Command Prompt
If you prefer using Command Prompt, you can completely uninstall OneDrive on your Windows 10 computer by following the steps below.
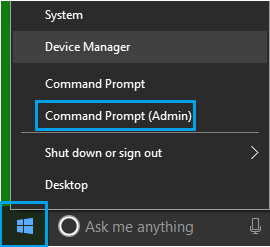
Right-click on the Start button and click on Command Prompt(Admin) option.
In the command prompt window, type the following commands and hit the enter key on the keyboard of your computer.
For 32-bit system – %systemroot%\System32\OneDriveSetup.exe /uninstall For 64-bit system – %systemroot%\SysWOW64\OneDriveSetup.exe /uninstall
Once the command is executed you will not see a confirmation, but if you search for OneDrive in the Apps section, it will not show up.
How to Disable Auto Save to OneDrive in Windows 10/11 How to Fix High CPU Usage By OneDrive In Windows 10