In this guide, we will walk you through effective ways on how to do a system restore on Windows 10 laptop or desktop computer.
How Use System Restore in Windows 10 to Go Back to An Earlier State?
Microsoft Windows is undeniably one of the most preferred and used operating systems worldwide. It is pretty robust and is well equipped to recover from any situations that might obstruct it from working properly. However, even this powerful tool can fail at times and requires manual intervention. The latest Windows OS versions are powered with various recovery tools including system restore points. Although we hope that you never face system issues, there is no harm in familiarizing yourself with some of the recovery options available that you can use to ensure a smooth system working. System Restore option is set on the disable mode by default. Here is how to enable system restore points on Windows 10 PC.
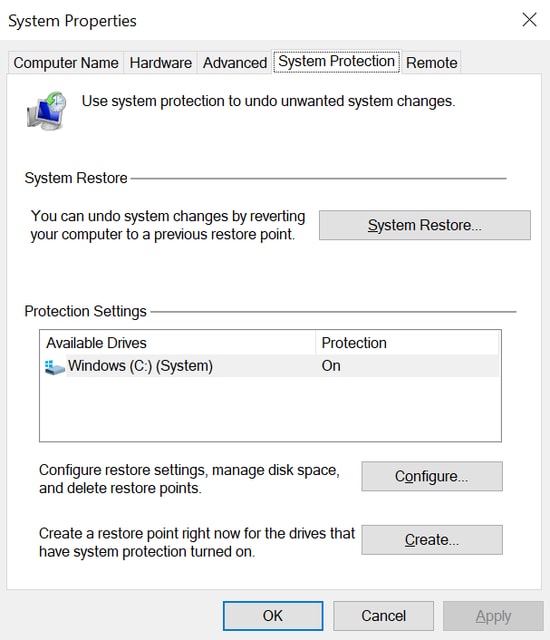
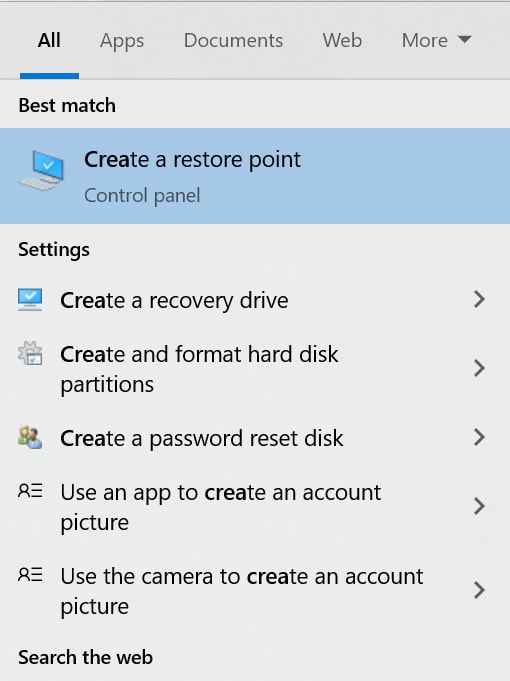
Open the Start Menu on your PC, then search for “Create Restore Points”.Now from the newly displayed window, click on the “System Properties” tab.
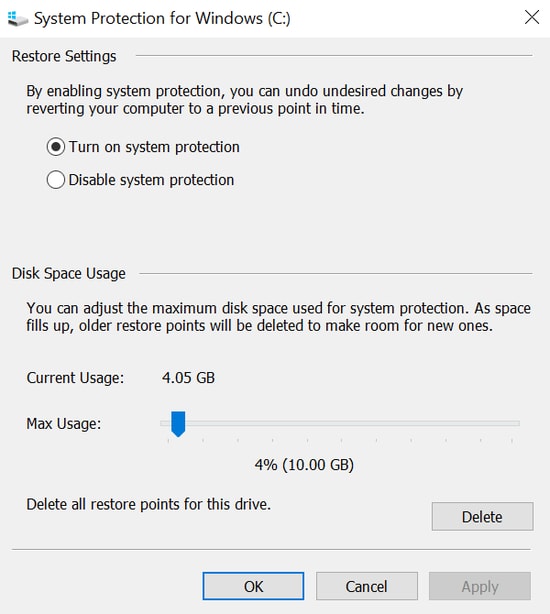
Next, select the main system drive under the “Protection Settings” option and click on the Configuration button.Now from the available options choose “Turn on System Protection” .and click on the Apply button.
Doing this will create a system restore points on your PC whenever a new update is applied or your device goes through some major changes.
Read Also: Top Data Recovery Software for Windows
How To Create System Restore Points on Windows 10 PC
Once the system restore option is enabled on your Windows PC it will automatically create restore points whenever your system undergoes drastic changes. However, experts recommend creating them manually to ensure the utmost safety. Follow the below-mentioned steps for creating windows 10 system restore points.
Launch the Start Menu and select “Create A Restore Point”.
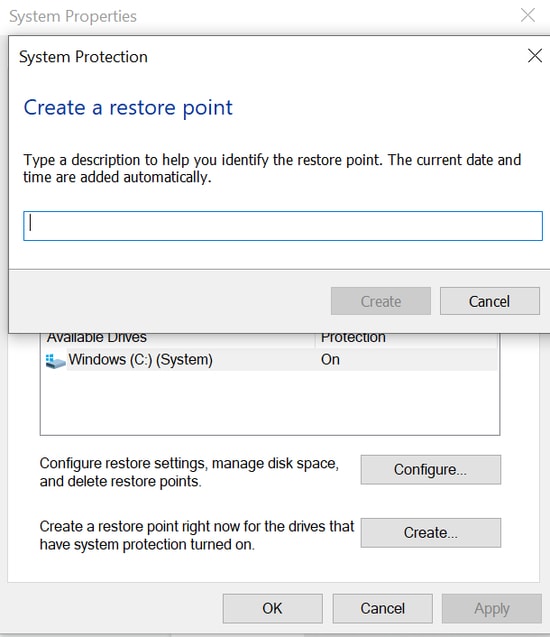
Then from the newly opened window click on the System Properties option.Under it click on the Protection Settings button and click on the Create button to create a new system restore point.
Give a name to the restore point, something that can help you identify when and for what purpose it was created.Finally, click on the Create button followed by the Close button.
This whole process will help you create restore points and will provide an easy option to undo changes and restore the computer to an earlier date on windows 10.
How To Use System Restore Points To Undo Actions and Recover Your Device
If while updating your computer system or while doing certain changes you run into issues then use system restore point to undo the changes.
Undoing System Changes With Desktop Access
In case you can still access your desktop, follow the below guide to undo system changes using system restore point on Windows 10.
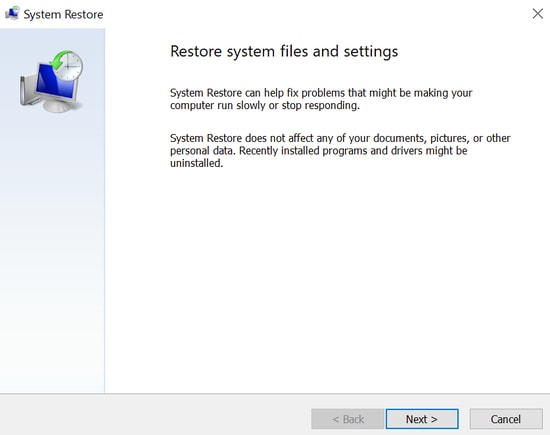
Launch the Start Menu on your Windows PC.Choose the “Create a restore point” option.Then from the System Properties window select System, Protection.Next click on the System Restore button and press the Next button.
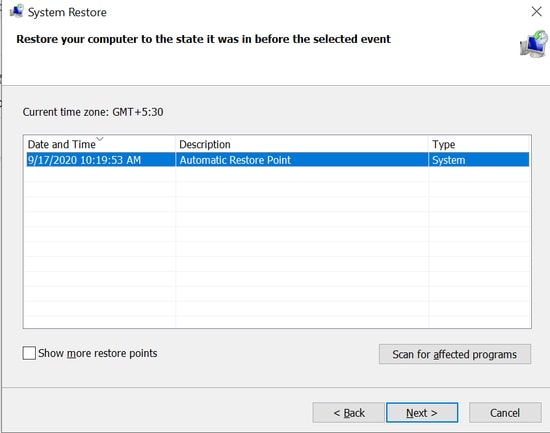
Select the relevant system restore point that you wish to use.Now click on the Scan for Affected Programs button, this will give you a detailed list of all the apps
Click on the Close button followed by the Next button and then finally click on the Finish button.Following the above steps will help you return your device to the previous working state.
Read Also: Free Disk Partition Manager Software for Windows 10
Use Advanced Startup to Undo System Changes
If you are facing issues starting your device or your desktop fails to work properly, then use the Advanced setup option to access system restore points.
Step 1: Boot In Advanced Setup
Turn on your Windows PC.Once the Windows logo appears on your screen press the power button. Repeat the process until your device reboots in recovery mode.Now move ahead to access the system restore points.
Step 2: Use System Restore
If you are unable to access your computer system use the below method to access System Restore.
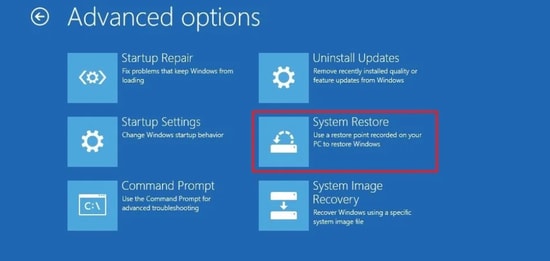
Use Windows 10 installation media to start your PC.From Windows Setup, click on the Next button followed by choosing the Repair your Computer button.Next, click on the Advanced options button and click on the Troubleshoot button from the list of options.
Under Troubleshoot click on the Advanced options button.
Now click on System Restore and then click on the Next button.
Choose and set desired restore points.Now click on the Scan for affected programs, this will tell you which application will no longer be available for use as they were installed after a specific windows 10 system restore point was created.
Now click on the Close button followed by the Next button and in the end click on the Finish button.Once you are through with the above steps, this will take care of the issues that you were facing and will start your device in normal conditions.
Read Also: Best Windows Disk Cloning Software
Wrapping Up
The above-mentioned procedures provide a simple way to restore a computer to an earlier date on Windows 10. The good part is that these steps also work equally well on earlier versions of Windows OS, including 7 and 8. Here we would like to point out that system restore points do not provide an alternative to system backups. If your device is facing unrepairable issues and repeated physical errors then there are high chances that you may face data loss. We recommend you to create regular system backups to combat data loss. Lastly, before bidding adieu, if you found this article helpful, then subscribe to our newsletter to keep yourself updated with the latest developments and technology-related blogs.
