Uninstall Updates in Windows 10
Microsoft services its Windows 10 operating system by providing “Feature updates” (Every 6 months) and “Quality updates” on a monthly basis. Feature Updates are major operating system updates that are made available to Windows 10 computers by Microsoft twice a year (Spring and Fall). Quality Updates (also known as “cumulative updates”) are minor updates that are automatically downloaded and installed on your computer every month (second Tuesday of every month). If your computer has become unstable, running slow or going through problems, Windows 10 provides the option to Uninstall or remove both “Feature Updates” and “Quality Updates” from the computer.
1. Uninstall Cumulative Update in Windows 10
As mentioned above, cumulative or quality updates are minor monthly updates and these can be easily uninstalled at any time on your computer.
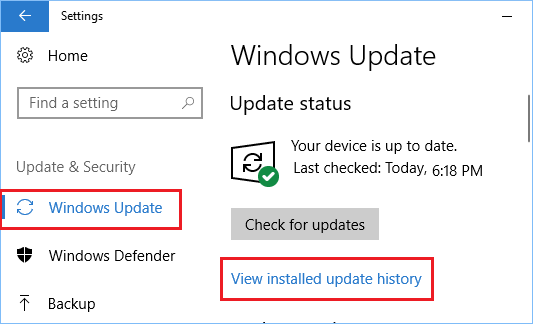
Go to Settings > Update & Security > On the next screen, click on Windows update in the left pane. In the right-pane, scroll down and click on View update history link.
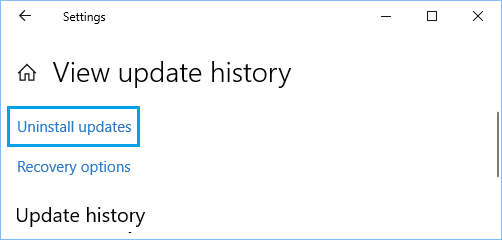
On the next screen, click on Uninstall updates link.
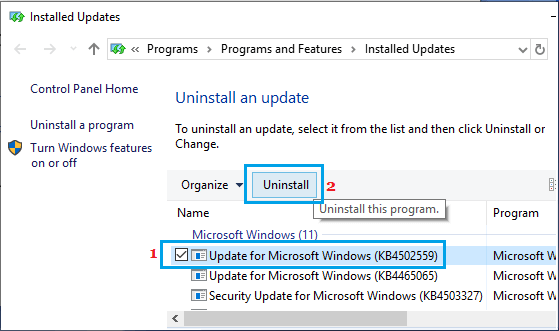
On the next screen, select the Windows Update that you want to delete and click on the Uninstall option.
On the confirmation pop-up, click on Yes to confirm. Wait for Windows to Uninstall the Update from your computer.
2. Uninstall Feature Update in Windows 10
When a Feature update (major update) is installed on the computer, Windows 10 keeps the files required to revert back to the previous version for a period of 10 days. If you are within 10 days of a Feature update, you can follow the steps below to Uninstall the Feature Update from your computer.
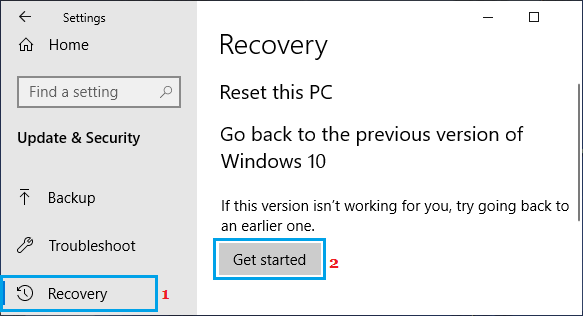
Go to Settings > Update & Security > On the next screen, click on Recovery in the left pane. In the right-pane, click on Get Started button located under “Go back to previous version of Windows 10” section.
Follow the instructions to complete this process. If Get Started option under “Go back to a previous version” section is greyed out or not working, your computer does not have the required files to roll back to the previous version of Windows. The only option in this case is to use system restore or reinstall Windows 10 from a backup that you may have saved on your computer.
3. Remove Temporary Update Files
While most of the downloaded Windows Update files become part of the system, some files may not be used and remain on your computer consuming storage space. Follow the steps below to remove temporary update files and recover valuable storage space on your computer.
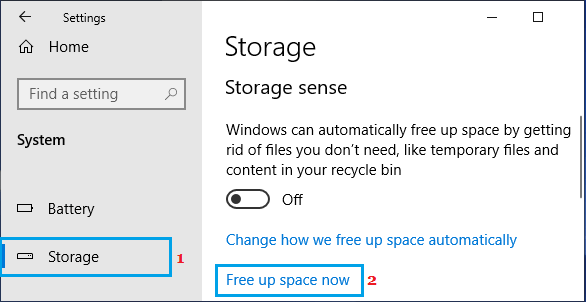
- Go to Settings > System > On the next screen, click on Storage in the left pane. In the right-pane, click on Free Up space now link.
- Wait for Windows 10 to analyze the storage space on your computer.
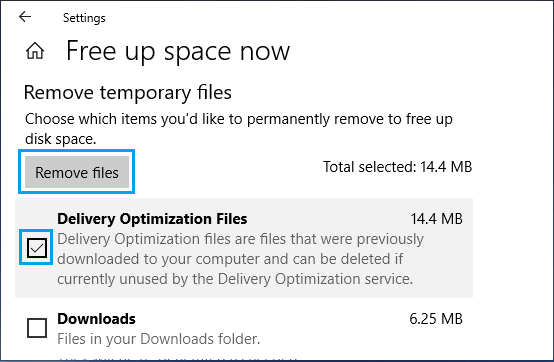
- On the next screen, select Delivery Optimization Files, Windows Update Cleanup and click on Remove Files.
Windows 10 will quickly remove all the selected temporary files from your computer.
4. Remove Uninstalled Windows 10 Update Files
Sometimes, the problem with Windows 10 update is due to some of the Update files failing to install on your computer. If this happens, you can follow the steps below to remove uninstalled Windows Update files from your computer.
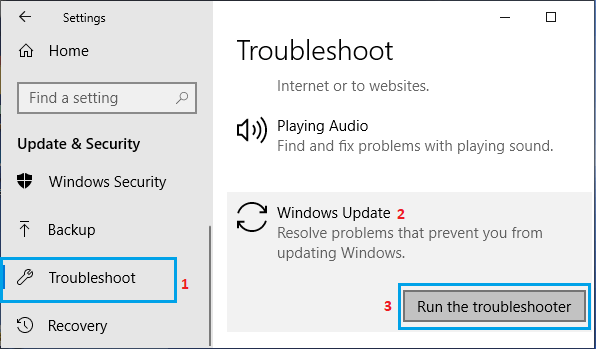
Go to Settings > Update & Security > On the next screen, click on Troubleshoot in the left pane. In the right-pane, scroll down and click on Windows Update > Run the Troubleshooter.
If prompted, enter your Admin Password. Wait for Windows to remove Uninstalled Update Files and fix problems related to Windows Update on your computer.
How to Upgrade From 32-bit to 64-bit Windows 10 How to Remove Bloatware From Windows 10 PC
