Snipping Tool App in Windows 10
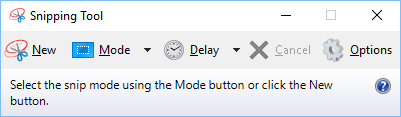
The Snipping Tool is an in-built Application in Windows computers that was first introduced by Microsoft in Windows 7, since then it has been a part of Windows OS in all versions, including Windows 10. Snipping Tool allows users to take screenshots by selecting a rectangular area, a free-form area, or the entire screen. You can also annotate the screenshots using coloured pens or the highlighter. Before going ahead with the steps to Take Screenshots Using Snipping Tool in Windows 10, let us first take a look at the User Interface of the Snipping Tool App.
As you can see in the image above, the Snipping Tool User Interface basically consists of five buttons designed to perform the following functions.
How to Start Snipping Tool in Windows 10
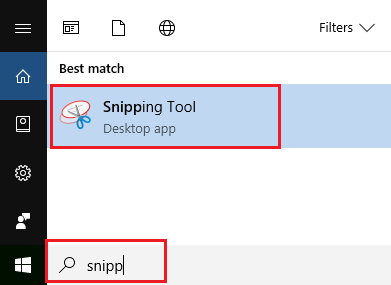
Now that you understand the Snipping Tool User Interface, let us take a look at some of the ways to access or start Snipping Tool App on your computer. Use Search Bar: Start typing Snipping Tool in the Search Bar and then click on the right search result (See image below)
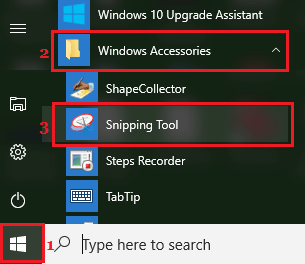
Use Start Menu: Click on Start > scroll down and click on Windows Accessories > Next, click on Snipping Tool shortcut.
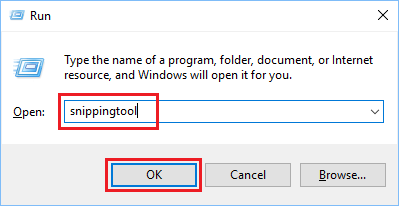
Use Run Command: Press Windows Logo + R keys on the keyboard of your computer to open Run Command Window, type snippingtool in the Open box and then click on OK or press the Enter key.
Take Screenshots Using Snipping Tool in Windows 10
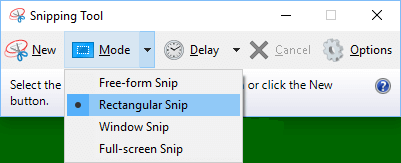
Finally, lets us take a look at the steps to Take Screenshots Using Snipping Tool in Windows 10. 1. Open the Snipping Tool App on your computer using any of the methods as described above. 2. On the Snipping Tool window, click on Mode and select the type of screenshot that you want to take from the drop-down menu (See image below)
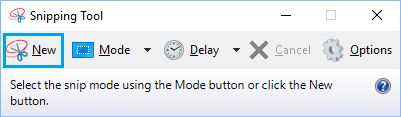
Note: You can also click on New and start taking screenshots on your computer.
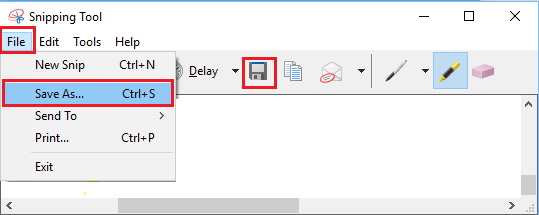
- Clicking on New or selecting a Screenshot Mode will make the screen faded and turn the Mouse Pointer into a cross-hair pattern. This will allow you to select the area that you want to capture in a screenshot by holding the Mouse key and dragging the cursor around the area. 4. Once your desired area is selected, release the Mouse Key and the screen shot will be copied to the Clipboard. 5. Next, you can either click on the Save Icon or click on File > Save As option to save the screen shot to any location on your computer (See image below).
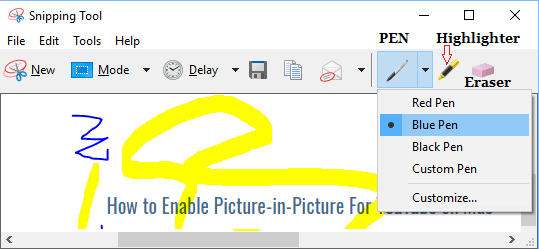
Annotate/Edit Screenshots Using Snipping Tool
As mentioned above, the Snipping Tool provides some basic tools like Pen, Highlighter and Eraser that you can make use of to Annotate and Edit your Screenshots.
For other methods of taking screenshots in Windows 10, you can refer to: How to Take Screenshots in Windows 10
Customize Snipping Tool
Clicking on the Options tab allows you to customize the way Snipping Tool behaves and appears on your computer.
Hide instruction Text: Hides text below the buttons in the Snipping Tool window. Always copy snips to the Clipboard: Copies screenshots to the Clipboard, allowing you to paste them into Paint, Word and other applications. Include URL below snips (HTML only): Saves screenshots as HTML documents and includes the URL of the website from which you took the screenshot. Prompt to save snips before exiting: Prompts you to save the screenshot, in case you happen to close the Snipping Tool, without saving your screenshot. Show screen overlay when Snipping Tool is active: Allows you to Turn OFF the white overlay which is displayed by default whenever you try to take a screenshot on your computer. Ink Color: Allows you to change the colour of the selection border that displays when you are trying to take a screenshot. Show selection ink after snips are captured: When you check this option, the selection border will appear around the screenshot after it is taken.
How to Take Screenshot Or Print Screen on Mac