Save Photos to SD Card On Android Phone
The process to set up an Android Phone to save pictures directly to the SD card, instead of using the phone’s sparse internal storage is easy and the steps below should be applicable to most Android Phones with an SD card slot.
Attach An SD Card to Android Phone
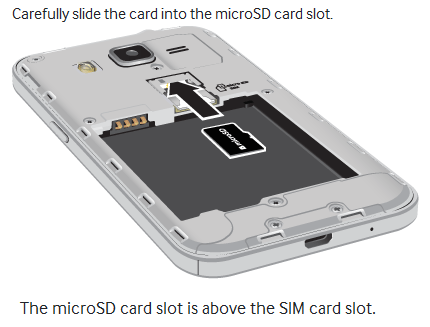
In case you haven’t already done this, insert an SD card into the SD card slot of your Android phone. For this you may need to open the back cover of your phone (where the battery is located), in case your phone does not have an accessible SD card slot. (See below image from samsung.com)
After the SD card is attached, open the camera app on your phone and see if there is a pop up message. On most Android Phones you should see a popup message asking you if you want to change the storage location to the SD card. It is easy to make a choice at this point, just tap on the option to save Photos to SD card. In case this message does not appear or you have missed it, you can still set up this option manually by going into the settings of your camera app.
Manually Setup Android Phone to save Photos to SD card
Follow the steps below to manually setup your Android Phone to save photos to its attached SD card.
- Open the Camera app on your Android Phone by tapping on the camera app icon.
- Tap on the Gear shaped Settings icon, you will find this located at the upper-left corner of your screen.
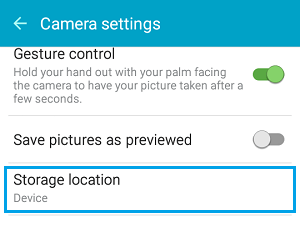
3. On the Camera Settings screen, scroll down and tap on Storage location.
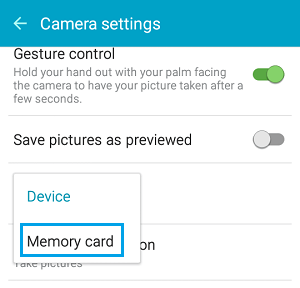
4. Next, tap on SD Card or Memory Card.
From now on all the photos that you take from your Android phone’s rear and front camera will be saved to the SD card attached to your Android Phone. Note: Screenshots will still be saved to your Phone’s internal storage in a folder named DCIM.
![]()