Delete Synced Photos From iPhone and iPad
While most Photos can be easily deleted on iPhone, Photos Synced to iPhone from Mac or Windows computer cannot be easily deleted on iPhone. The only way to remove Synced Photos from iPhone or iPad is to connect your device to the same Mac or PC from which the Photos were originally imported from.
1. Delete Synced Photos From iPhone Using Mac
Follow the steps below to remove Synced Photos from iPhone or iPad using Mac.
Plug iPhone into Mac using its supplied lightning cable.
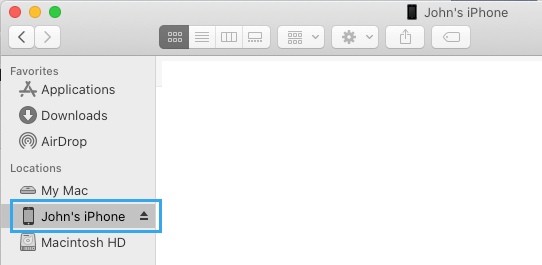
Click on the Finder icon and select your iPhone in the side menu.
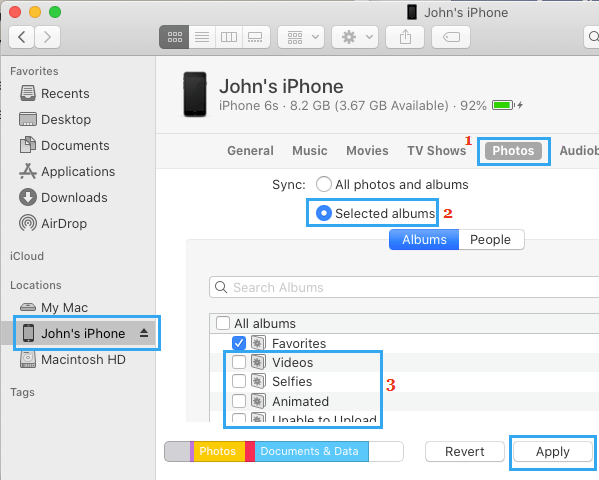
Next, click on Photos (1) tab > check Selected Albums (2) option and Uncheck Photo Albums (3) containing Synced Photos that you want to remove from iPhone.
After you are done unchecking Photo Albums, click on the Apply button.
Wait for the changes to Sync with your iPhone. Once the syncing process is completed, all the Synced Photos will be removed from your device.
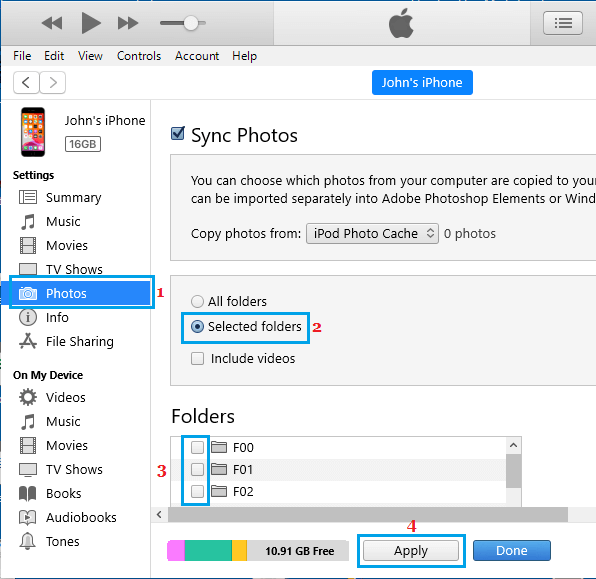
2. Delete Synced Photos on iPhone Using Windows computer
Except for a slightly different interface, the steps to remove Synced Photos from iPhone or iPad using Windows computer are similar to those on Mac.
Plug iPhone into Windows Computer using its supplied lightning cable.
Open iTunes and click on the Phone icon as it appears in iTunes.
Select Photos (1) in side menu > check Selected folders (2) option > Uncheck Photo Albums (3) containing Synced Photos that you want to remove from iPhone and click on Apply.
Wait for the changes to Sync with your iPhone. Once the Syncing Process is completed, all the Synced Photos will be removed from iPhone.
Selected Folders Option Greyed Out in iTunes
Many users have reported being unable to check “Selected Folders” option in iTunes on a Windows computer. If “Selected Folders” option is greyed out, click on the Down Arrow next to “Copy Photos from” option and select iPod Photo Cache Folder. The “iPod Photo Cache” Folder should be readily available for selection when you click on the Down Arrow next to Copy Photos from option. If not, you will find “iPod Cache Folder” within the Photos Folder from which you originally Synced Photos to iPhone. Once, you select iPod Photo Cache, the “Selected Folders” option will become available for selection.
How to Delete All Photos From iPhone or iPad How to Disable Photo Stream On iPhone Without Losing Photos
![]()