Users who have acquired Apple devices prefer to use FaceTime in order to stay in touch with their loved ones. Additionally, numerous Apple users frequently wonder, “Can I record FaceTime calls?” Well, if you are also one of them, then you will be happy to know that you can record your FaceTime calls, be it for business or personal purposes. Don’t worry, if you are unaware of how to record FaceTime calls on Mac and iPhone, we can help. In this write-up, we have explained the handiest approaches in order to record a FaceTime call on your preferred Apple devices, and that too without even seeking help from any third-party screen recorder tool. Now, without any further hustle, let’s get started!
Steps to Record FaceTime Calls on Mac, iPhone, and iPad in 2021
Can you record a FaceTime call? In order to record calls during FaceTime on iPhone, iPad, or Mac, all you need to have is a QuickTime Player and MacOS/ iOS. And, you don’t need to worry about investing any money or installing the software, because QuickTime Player comes pre-installed in macOS. Now, when you are familiar with the requirements, it’s time to read the simple steps below to record FaceTime calls on Apple devices.
How to Record FaceTime Calls on iPad and iPhone
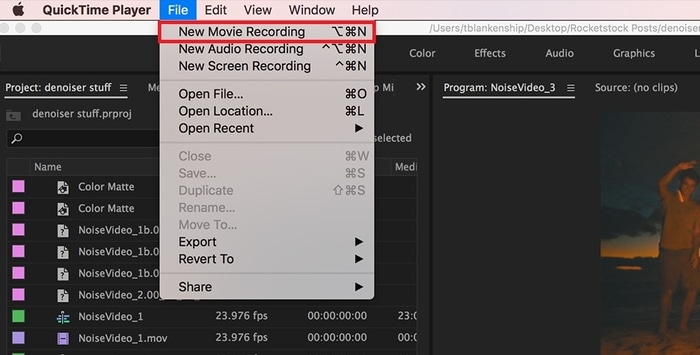
Anyways, you can save a FaceTime call on iPad and iPhone, but without audio. Because Apple doesn’t permit its iPad or iPhone users to record a FaceTime call with audio due to some privacy reasons. But, there is a simple workable tactic available that lets you do the same. For the same, you simply need to seek help from your Mac. Now, follow the steps below to perform FaceTime screen recording on iPhone and Mac: Step 1: First of all, you need to connect your iPhone or iPad to your Mac. For setting up the connection, one can use USB-C cable/ Lightning. Step 2: Then, invoke QuickTime Player on your Mac. Step 3: Locate the File menu and click on it to select the New Movie Recording option from the context menu list.
Step 4: After that, in the QuickTime Player window, you will see a down-side arrow next to the record button, click on that arrow.
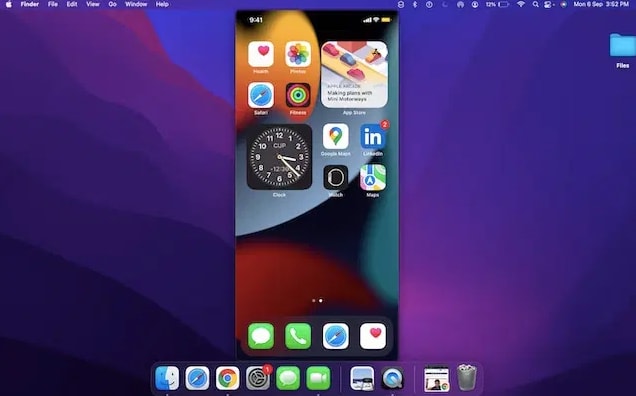
Step 5: Now, a list of available cameras appears on your screen, wherein you need to choose either iPhone or iPad. Step 6: Open the lock of your iOS device, and then you can see your iPad or iPhone’s display screen in the QuickTime Player on your Mac.
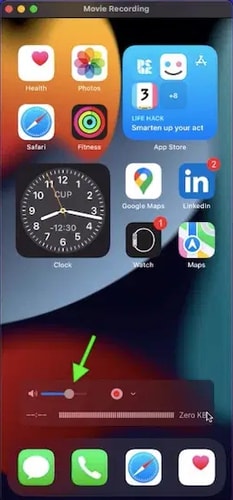
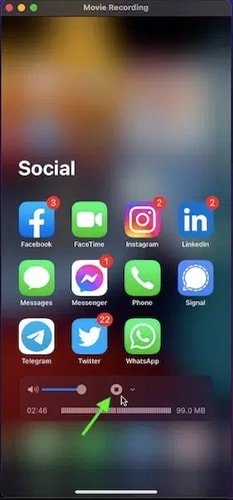
Step 7: Thereafter, make sure that the volume rocker is enabled in QuickTime Player. Also, you can increase or decrease the volume by dragging the volume slider as per your preference.
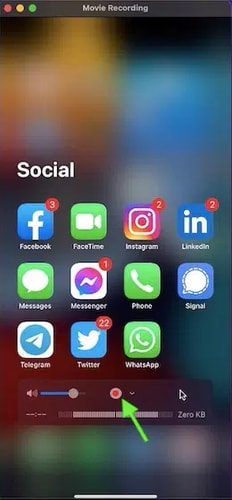
Step 8: Now, it’s time to open FaceTime on your iPad or iPhone, and click on the Record button.
Step 9: Begin FaceTime call on your iPhone or iPad and start recording it through your Mac.
Step 10: Once you are done with your FaceTime call, then make a click on the Stop button to hang up the recording.
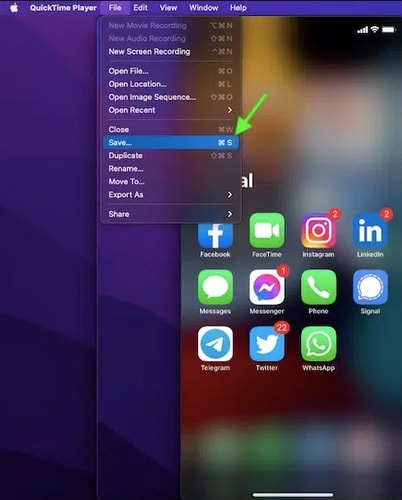
Step 11: Furthermore, head to the File menu again and select Save as an option.
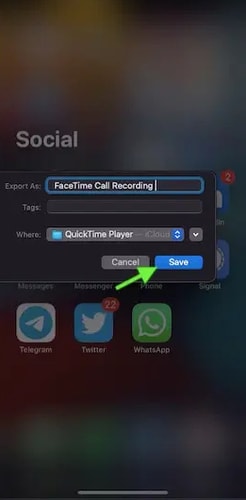
Step 12: Lastly, choose the location you wish to save the recording and click on the Save button to get it completed.
See how easy it is to record FaceTime calls on iPhone and iPad using Mac. Also Read: 6 Best Call Recording Apps For iPhone In 2021
How to Record a FaceTime Call on Mac
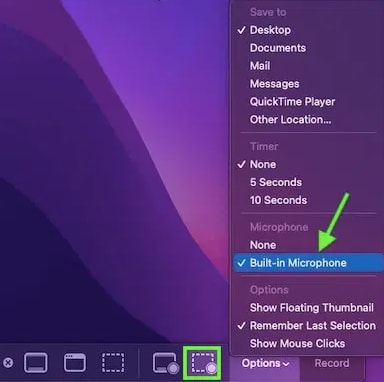
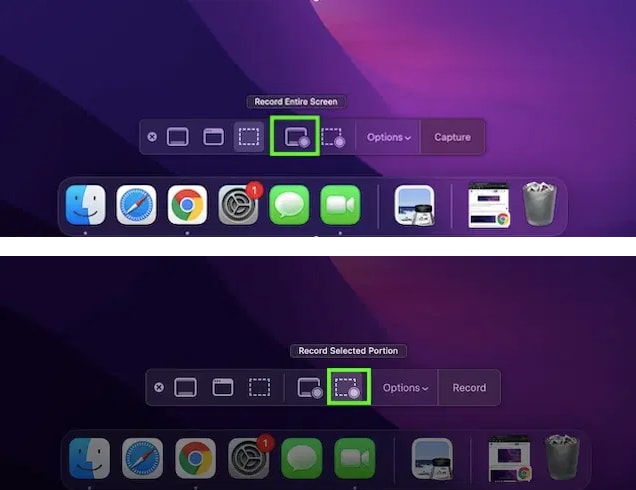
Follow the simple steps shared below to learn how to record a FaceTime call on Mac. Step 1: To get started, open your Mac and invoke the FaceTime app on your Mac. Step 2: Thereafter, altogether hit Command + 5 + Shift keyboard buttons to summon the Screenshot menu. Step 3: Now, from the menu, choose Options to proceed further.
Step 4: Next, under the Save to, choose the location where you wish to save your recorded FaceTime call. Anyways, the screen recordings are saved by default to the Desktop on your Mac.
Step 5: Then, under the Microphone select the Built-in Microphone option.
Step 6: After this, click on the Record Selected Portion or Record Entire Screen options in order to choose your preferred recording area.
Step 7: Finally, make a click on the Record button to initiate the recording on your Mac.
Step 8: Now, start a FaceTime call. Once you cut the call, then click the Stop Recording option from the Menu presented at the top.
That’s all, now, your FaceTime call recording will be stored at your desired location. Now, you can see the recorded call whenever you want and even share it around your circle through AirDrop, Whatsapp, iMessage, and many more. Also Read: How to Connect Your Apple iPad to Your TV
Recording FaceTime Video Calls on iPad, iPhone, and Mac: DONE
So, that’s all you need to do to record your FaceTime calls with audio on your Mac, iPhone, or iPad. We hope you have liked our write-up. Do tell us in the comments if you know of any other methods to do the same task of recording FaceTime video and calls on Mac, iPhone, and iPad. Lastly, before you go, do subscribe to our Newsletter for staying up to date and informed. Along with this, you can also witness our journey on Facebook, Twitter, Instagram, and Pinterest.
