Windows 10 Stuck on Checking For Updates
It can really be confusing when Windows 10 gets stuck on Checking For Updates and nothing appears to be happening. When Windows 10 is stuck Checking For Updates, there is no indication as to what is happening behind the scene. There is really no way to guess or tell whether the computer is waiting for a download, preparing to install updates or simply stuck. You will find below some of the methods that are known to fix the issue of Windows 10 Stuck on checking for Updates forever.
1. Restart Computer
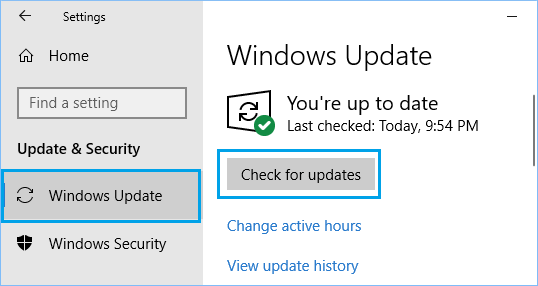
Sometimes, the simple act of restarting the computer can terminate stuck processes, resolve conflicts and fix the problem of computer stuck on Checking for Updates. Restart the computer > After the computer restarts, go to Settings > Update & Security > click on Windows Update in the left pane and click on Check For Updates button.
2. Restart Windows Update Service
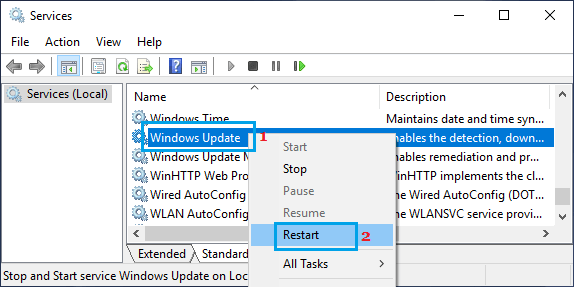
Right-click on Start button and click on Run. In the Run command Window, type services.msc and click on OK.
On the services screen, right-click on Windows Update and click on Restart option.
After this, check to see if Windows updates can now be installed on your computer.
3. Run Windows Troubleshooter
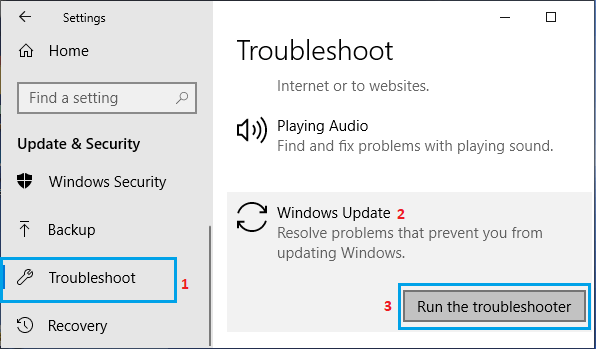
Follow the steps below to fix Update problems on your computer using the built-in Troubleshooter as available on your computer. Go to Settings > Update & Security > navigate to Troubleshoot > Windows Update > Run Troubleshooter.
Wait for Windows to find and fix problems related to Windows Update on your computer. Most of the times the Troubleshooter is able to identify and fix Windows Update problems.
4. Clear Software Distribution Folder
Windows Updates can get stuck due to presence of corrupted update files in SoftwareDistribution Folder located at C:\Windows\SoftwareDistribution . This can be corrected by stopping Windows Update Service, deleting everthing in SoftwareDistribution Folder and restarting Windows Update Service.
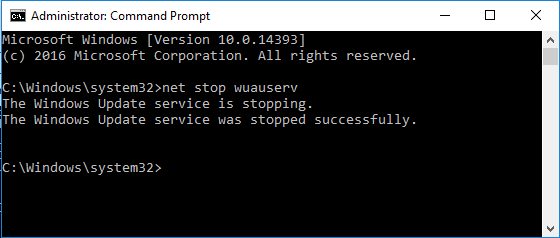
- Right-click on the Start button and click on Command Prompt (Admin). In the Command Prompt Window, type net stop wuauserv and press the Enter key.
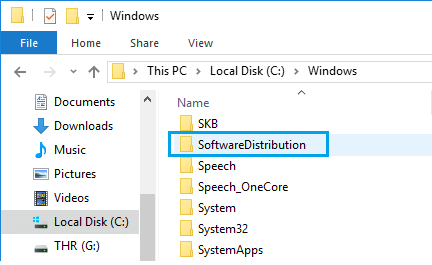
Once the command is executed, it will stop Windows Update Service on your computer. Note: Do not close the Command Prompt Window, leave it open and move to step 3 below. 2. Next, right-click on the Start button and click on File Explorer. In File Explorer window, navigate to This PC (Or Local Disk (C:)) > Windows Folder.
- In the Windows Folder, open SoftwareDistribution Folder.
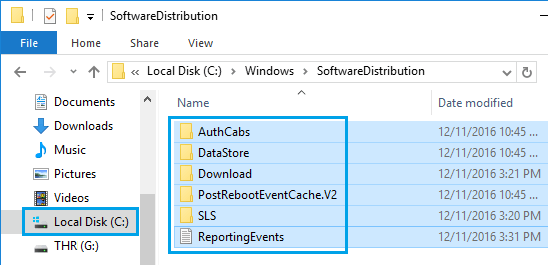
Note: Just to be on the safe side, copy “SoftwareDistribution” folder to your desktop as a backup 4. In SoftwareDistribution Folder, select and Delete all Files located in SoftwareDistribution Folder.
Note: These are temporary files and Windows 10 will create them again from scratch. 5. After deleting Files in SoftwareDistribution folder, restart Windows Update service by typing net start wuauserv in the Command Prompt Window and pressing the Enter Key.
After this go to Settings > Update & Security > Windows Update and click on Check for Updates button. Hopefully, this time you should be able to install Updates on your computer.
How to View Installed Updates in Windows 10 How to Uninstall Windows 10 Update