DNS Server Not Responding Error in Windows
As you must be aware, the primary function of a DNS (Domain Name System) server is to translate the website name into the IP address at which the website that you want to connect to is located. For example, when you try to access “google.com” on your computer, the DNS server translates it to 216.58.218.196, allowing the web browser to connect to the IP address at which Google’s website is located. This practically means that you won’t be able to access the website, in case the DNS server is going through problems or your computer is unable to connect to the DNS server, due to network connectivity issues. So, let us go ahead and take a look at some of the commonly used methods to fix DNS Server Not Responding Error on a Windows computer.
1. Restart Modem/Router
The first step would be to Restart your computer and reload the webpage that you were trying to access. This can help in case the problem was due to a minor technical glitch. If this does not help, power OFF your Modem/Router and also pull out the power cable from the wall socket. After 2 minutes, connect the Router/Modem to the power source and Restart it again.
2. Flush DNS Cache, Reset IP and Reset Network Adapter
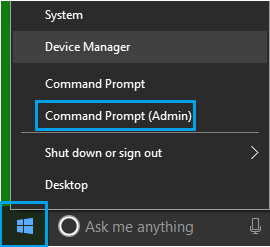
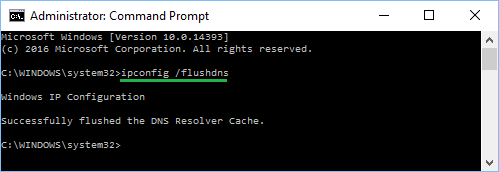
The next step would be to Flush DNS Cache, Reset IP and Reset the Network Adapter using the Command Prompt Window. Right-click on the Start button > Command Prompt (Admin)
On the Command Prompt window, type the following Commands (in order) and hit the enter key after each command.
After running above commands, type Exit and press the enter key to close the Command Prompt Window. Restart your computer and check to see if you are still getting DNS Server not responding error on your computer.
3. Automatically Detect Settings
Allowing your computer to automatically detect Network settings is another commonly used method to fix network connectivity issues on a Windows computer. Click on the 3-dots Chrome menu icon located at the top-right corner of your screen and click on Settings in the drop-down menu.
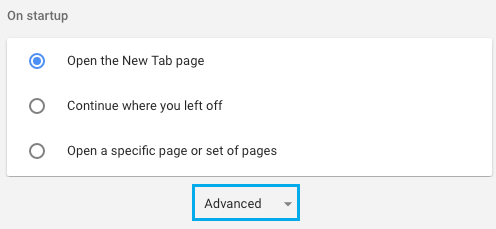
On the Settings screen, scroll down to the bottom of the page and click on Advanced.
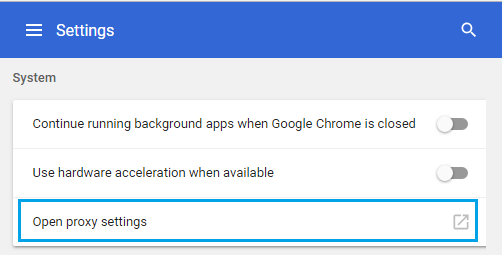
Scroll down more until you reach “System” Section and click on Open Proxy Settings.
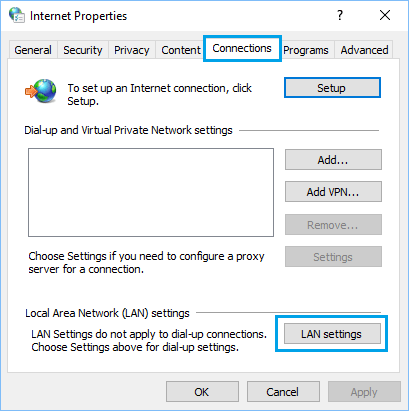
On the next screen, click on the LAN Settings button, located under “Connections” Tab.
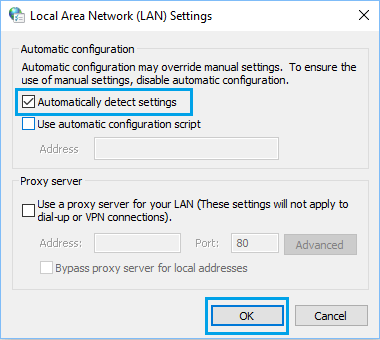
On the Local Area Network Settings screen, check the option to Automatically detect settings and click on OK.
Make sure you Restart your Computer, before checking to see if you are still getting DNS Server not responding error on your computer.
4. Disable IPv6
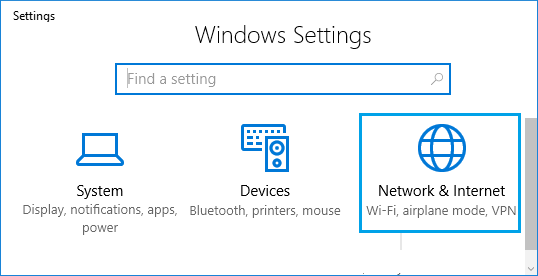
Disabling IPv6 is known to help in fixing network connectivity issues on a Windows computer. Click on the Start button > Settings > Network and Internet.
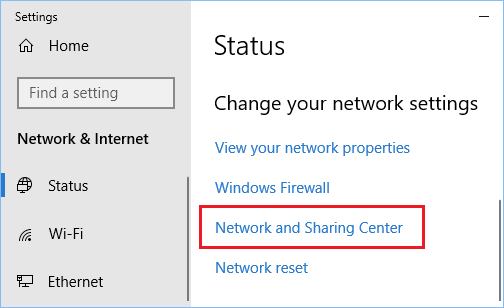
On the next screen, scroll down and click on Network and Sharing Center.
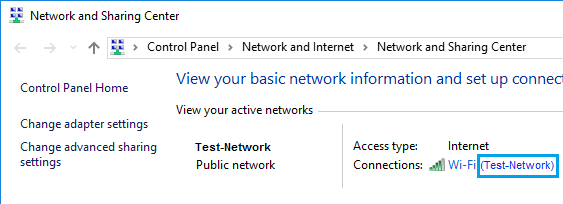
On the Network and Sharing Center screen, click on your Current Network.
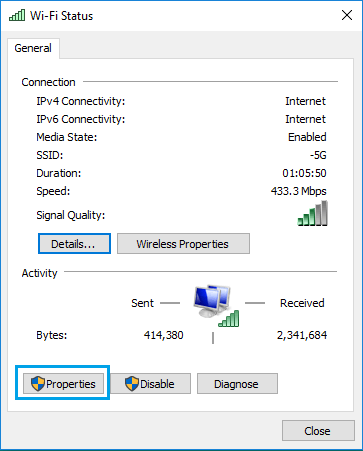
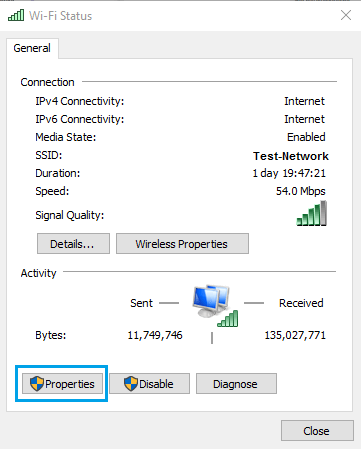
On the next screen, click on the Properties button.
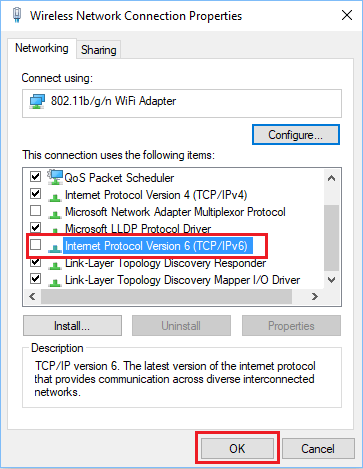
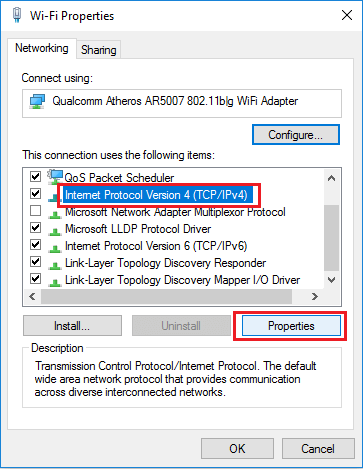
On the Network properties screen, uncheck the option for Internet Protocol Version 6 (TCP/IPv6) and click on OK to save the setting.
After disabling IPv6, you need to Restart your Computer in order to apply the change.
5. Update Network Driver
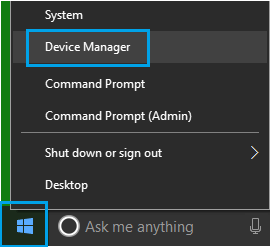
It is possible that the Network Adapter on your computer has not been automatically updated by your computer. Right Click on the Start button and click on Device Manager.
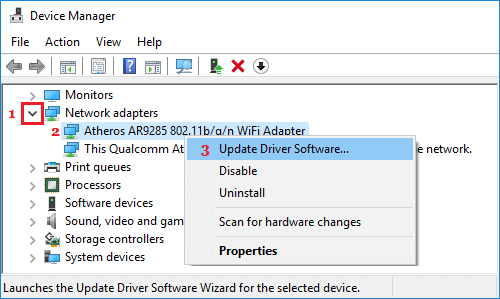
On the device Manger Screen, expand Network Adapters by clicking on it. Next, right-click on the WiFi Adapter for your computer and click on Update Driver Software option in the contextual menu.
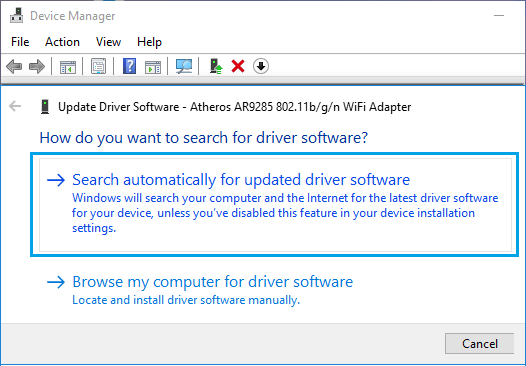
Tip: In case there are multiple entries, look for something that has WiFi in it or says Network or 802.11b. On the next screen, click on Search Automatically for Updated Driver Software.
Wait for your computer to search for the Latest Driver Software as available for the WiFi Adapter. Follow the onscreen instructions to Install the driver software (in case available).
6. Switch DNS Servers
In case your computer is frequently coming up with DNS Server not responding error, it is likely that the DNS servers of your service provider are becoming congested or experiencing problems. In such a case, you may want to ditch the DNS servers of your service provider and switch to Google’s fast and free DNS service. Click on the Start button > Settings Icon > Network & Internet.
On the next screen, click on Network and Sharing Center link.
On the Network and Sharing Center Screen, click on your Network Name.
On the next screen, click on Properties.
On the properties screen, select Internet Protocol Version 4 (TCP/IPv4) and click on the Properties button.
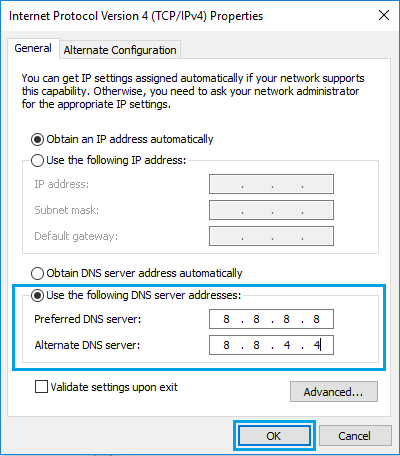
On the next screen, select Use the following DNS Server addresses option and enter 8.8.8.8 and 8.8.4.4 as your Preferred and Alternate DNS servers.
Click on OK to save the new DNS Server settings. Note: In case you want to use OpenDNS, type 208.67.222.222 and 208.67.220.220 as your Preferred and Alternate DNS servers.
How to Fix This Site Can’t Be Reached Error in Chrome How to Fix Aw, Snap! Error in Chrome Browser
![]()
