However, before heading into the solutions to fix CRC error, we think you should also learn what the Data Error Cyclic Redundancy Check issue is.
What is Cyclic Redundancy Check Error?
Cyclic Redundancy Check is a data error-detecting code utilized for data validation. When this error appears, it means that there is something incorrect with the optical disks, hard drives, or files. The CRC error can be occurred by the file itself or the hard drive. So, firstly, you should try to copy the file to other drives to specify the cause. If in case, you can’t make a copy of the file to other files, then the issue is in the file itself. And, if you can copy the file to other drivers, then the issue is with the hard drive. But, don’t panic, the issue is solvable too. Also Read: Data Recovery Services vs. DIY (Do It Yourself)
Ways to Fix Data Error Cyclic Redundancy Check on Windows 10, 8, 7
You can recover the file if the issue is in the file itself. And, if in case, the issue appears with the hard drive, then consider repairing the drive. In this section, we are going to explain both ways to fix the external hard drive data error cyclic redundancy check issue in Windows PC. Let’s get started:
Way 1: Recover the File
If the data in the file is not important, then you can simply ignore the error message and just remove the file. But, if in case, the data in the file is important for you, and you can’t afford the risk of losing it. Then, you can easily recover the file. To do this more precisely, you can use any reliable third-party data recovery programs like Stellar Data Recovery Software and more. Such tools will help you automatically recover any faulty or corrupted file and data.
Way 2: Repair the Drive
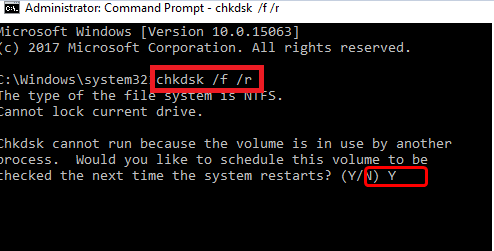
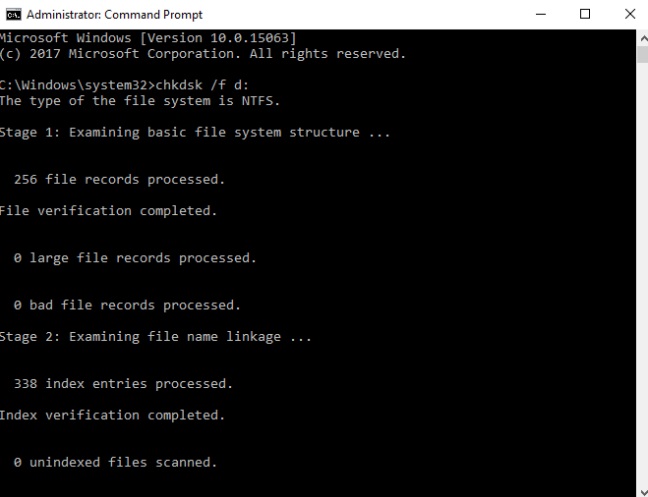
In order to repair the drive, you can try to run a CHKDSK command using Windows in-built utility called Command Prompt. CHKDSK can scan or check for the integrity files of your hard disk and helps you resolve numerous system errors. Below are the steps you need to follow: Step 1: Launch Command Prompt under Administrator’s privileges. Step 2: Write the command in the prompt window “chkdsk /f x:”. And, then replace the x: with the drive that you are facing issues with.
For example, if you are having issues with your d drive, then input “chkdsk /f d:” (check the reference below). Step 3: After that, hit the enter keyboard button from your keyboard. This process will take a bit longer. So please be patient until it is 100% finished.
Step 4: Reboot your PC to validate the recent changes. Hopefully, your problematic hard drive should be recovered. But, if unfortunately, the issue persists, then you should format your hard disk. However, do keep in mind that formatting the complete disk will delete all the data in the disk. So, please be sure you know what you are about to do. If you are not confident about your technical skills, then you can also visit the PC repair store located near you and contact IT technicians for further assistance. Also Read: Cybersecurity & Personal Data Protection Tips to Stay Safe
Data Error Cyclic Redundancy Check: FIXED
So, that was all about how to fix the data error cyclic redundancy check issue on Windows 10, 8, 7 PC. We hope you have liked the shared information. If yes, then do subscribe to our Newsletter for more tech-related articles & updates. And, if you face any queries while executing the above methods, then please feel free to comment in the box below. We will try our best to help you out. Also, you can drop your suggestions in the comments. Lastly, follow us on our Social Media Channels: Facebook, Twitter, Instagram, and Pinterest.