Create Contact Groups In Gmail
While it is easy to add a few people to the address field in Email, things can get complicated when you are required to send a Group Email Message to a large number of people. As you can imagine, the process of adding people manually to a Group Email is both time consuming and prone to serious errors. Luckily, this task can be simplified by Creating Contact Groups in Gmail and addressing Group Emails to Contact Groups, instead of manually adding each recipient to the Address field. Once you get familiar with creating and managing Contact Groups in Gmail, you will notice an amazing increase in your Gmail productivity and efficiency.
1. Steps to Create Contact Group In Gmail
Follow the steps below to Create Contact Group in Gmail. This will be an empty Contact Group or Label, to which we will be adding people in the next step.
Login to your Gmail Account on a Windows computer or Mac.
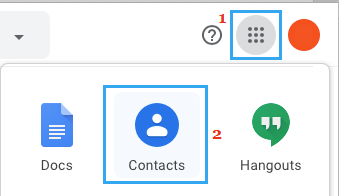
Click on Google Apps icon (top-right corner) and select Contacts option in the Apps menu.
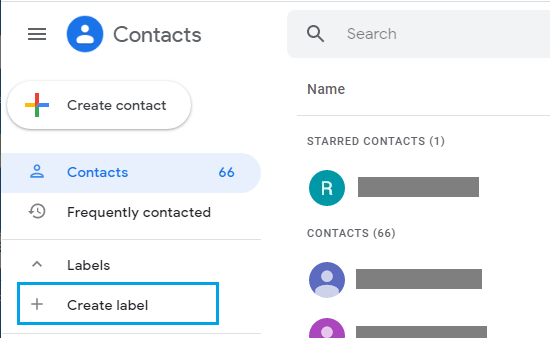
On the Contacts screen, click on + Create Label option in the side-menu.
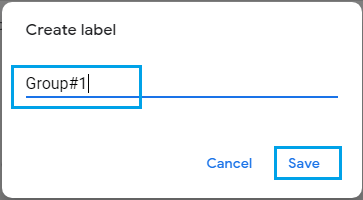
On the pop-up, type the Name of your Contact Group and click on Save.
The above steps will create an Empty Contact Group or Label to which Contacts can added at any time.
2. Add People to Contact Group in Gmail
Once your Contact Group or Label is available, it is really easy to Add Contacts to this Contact Group.
Login to Gmail > click on Google Apps icon and select Contacts option in the Apps menu.
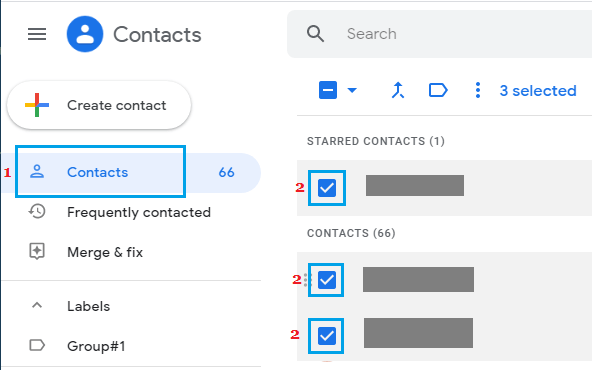
On Contacts screen, make sure you are on Contacts (1) tab and select the Contacts (2) that you want to Add to Contact Group.
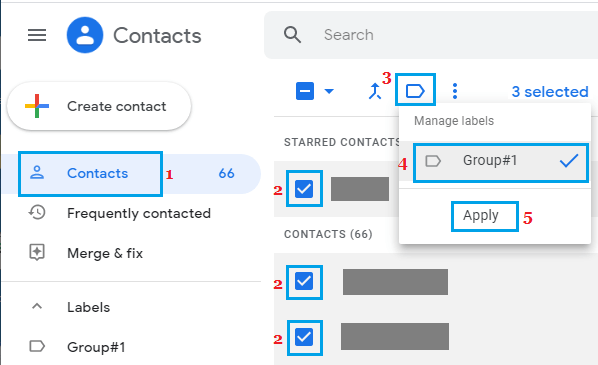
After selecting Contacts, click on the Labels icon (3), select your Contact Group (4) in the contextual menu and click on Apply (5).
The selected Contacts will be immediately added to your Contact Group.
3. How to Send Group Email Message in Gmail
Now that you have a Contact Group with members in it, you can follow the steps below to send a Group Email to all the people in your Contact Group.
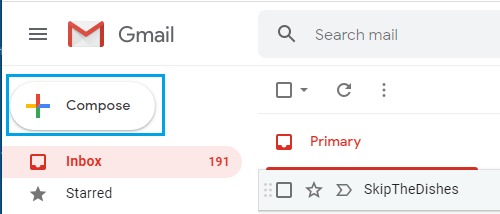
Login to your Gmail Account and click on Compose.
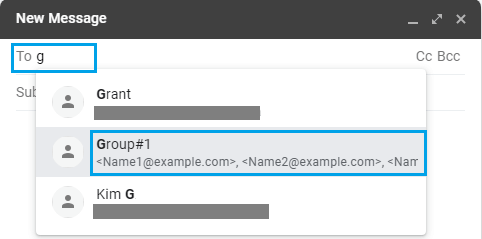
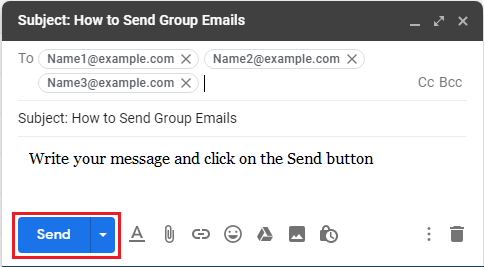
On New Message window, start typing the Name of your Contact Group in To field and you will be select it in the drop-down.
Write your Group Email Message and click on the Send button.
As you can see in above image, all the Group Members will be automatically added to the ‘T0’ field.
3. Add New People to Contact Group
If the Contacts that you want to add to Contact Group are not available in your Gmail Account, you can follow the steps below to Add New Contact to your Contact Group in Gmail.
Login to Gmail > click on Google Apps icon and select Contacts option in the Apps menu.
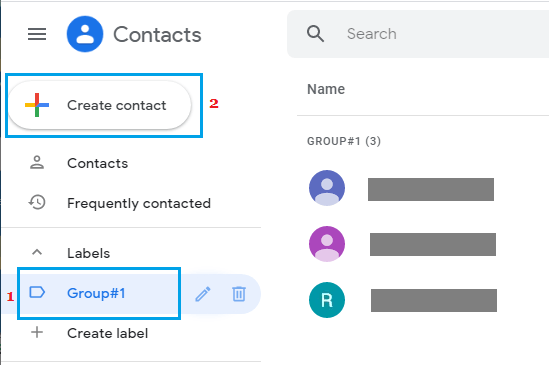
On Contacts screen, select the Contact Group (1) to which you want to add New Contacts to and click on + Create Contact (2) option.
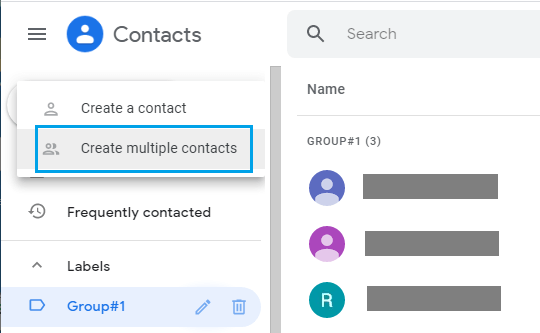
In the contextual menu, click on ‘Create a Contact’ or Create Multiple Contacts option.
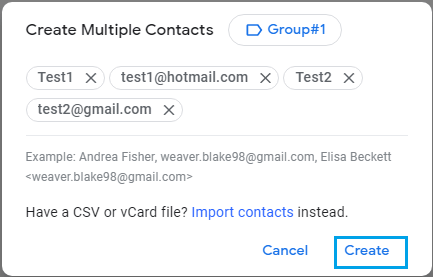
On the pop-up, enter Contact Name, Email Address and click on Create.
Note: Make sure you enter multiple Contacts in the same format as shown in example. All the New Contacts will be added to the Contact Group and also to your list of Gmail Contacts. Later on you can access the Contacts individually and fill in other details as required.
4. Remove People From Contact Group
At any time, you can remove a Contact from Gmail Contact Group by following the steps below.
Login to Gmail > click on Google Apps icon and select Contacts option in the Apps menu.
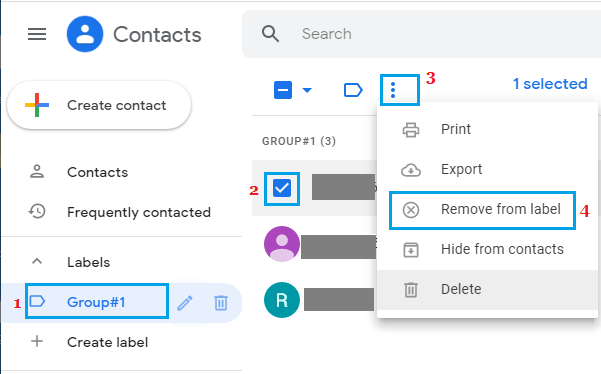
On the Contacts screen, select the Contact Group > select Contacts that you want to remove > click on 3-dots menu icon and select Remove from Label option in the drop-down menu.
This will remove the Contacts from Contact Group, but the Contacts will still be available in your List of Gmail Contacts. Note: Clicking on the Delete option will permanently remove the selected Contacts from your Gmail Account.
5. Delete Contact Group in Gmail
In case you are no longer using a Contact Group, you can easily delete the Contact Group, without losing any of your Contacts.
Login to Gmail > click on Google Apps icon and select the Contacts option in Apps menu.
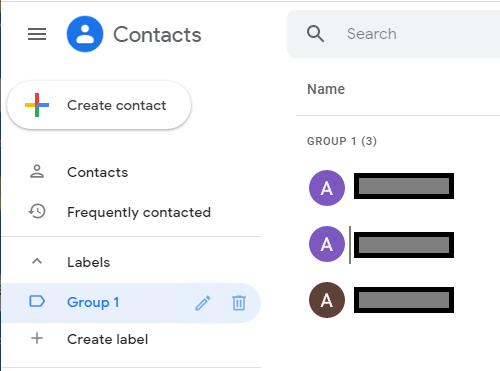
On the Contacts screen, select the Contact Group that you want to delete and click on the Trash Can icon.
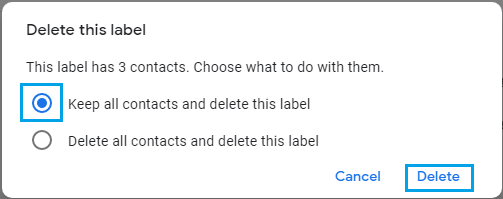
On the pop-up, select Keep all contacts and delete this label option and click on Delete.
This will delete the Contact Group or Label from Gmail, but all your Contacts will still be available in your Gmail Account.
6. Rename Gmail Contact Group
In case it becomes necessary, you can easily Rename your Contact Group by following the steps below.
Login to Gmail > click on Google Apps icon and select the Contacts option in Apps menu.
On the Contacts Page, select the Contact Group that you want to rename and click on the Pencil icon.
On the pop-up, type the New Name for your Contact Group and click on Save.
How to Remove Duplicate Contacts in Gmail How to Setup And Use Gmail With Outlook