Change User Name in Windows 10
After Installing Windows 10 or setting up computer, you can either create a Local User Account or create a Microsoft Account (Your Email) to login to your computer. While creating a Local User Account, you will be asked to provide a “User Name” and this Name will be displayed on the Welcome and Login screens. In the case of Microsoft Account, the User Name is taken from your online profile. In most cases, the “First Name” will become the Login Name and “Full Name” along with Email Address will be displayed on the Welcome and Login screens. In case you use your computer at a public place, you may not like the idea of your Name and Email Address being displayed. Luckily, it is easy to change User Name in Windows 10, whether you are using a Local User Account or a Microsoft Account to login to your computer.
1. Change Local User Name in Windows 10
In the case of a Local User Account, you can follow the steps below to change your User Name in Windows 10.
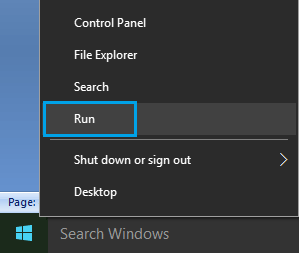
- Right-click on Start button and click on Run.
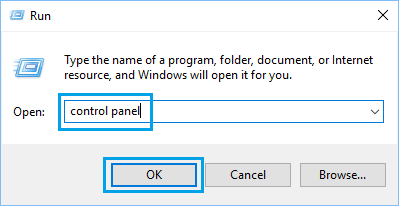
2. In the Run Command Window, type control panel and click on OK.
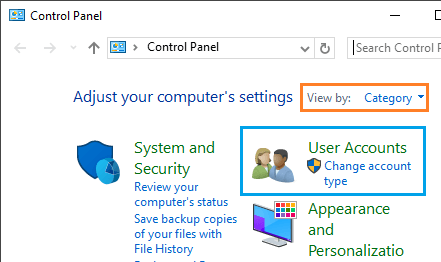
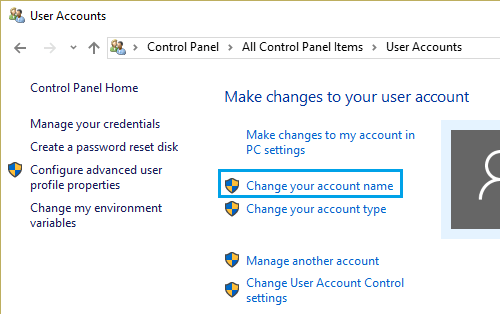
- On the Control Panel screen, make sure you are in “Category” view and click on User Accounts.
4. Next, click on Change your account name link.
5. On the next screen, type your New User Account Name and click on Change Name button.
The next time you login to your computer, you will see your New User Name.
2. Change Microsoft User Account Name in Windows 10
In case of Microsoft Account, the User Name is pulled from your online profile and you can either change this by going to account.microsoft.com or by following the steps below.
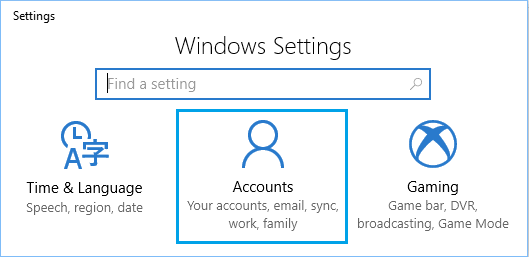
- Go to Settings > click on Accounts.
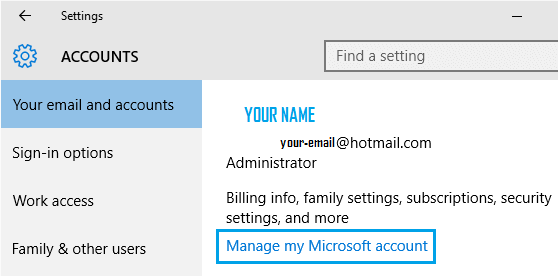
2. On the Accounts screen, click on Email and Accounts > Manage my Microsoft Account link.
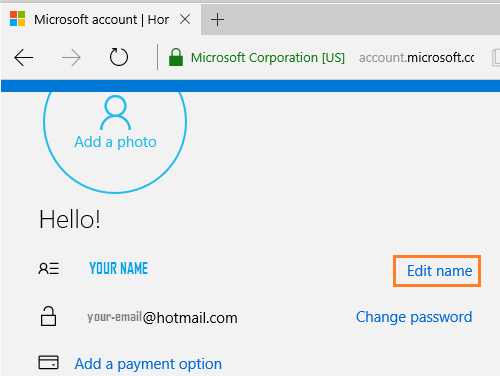
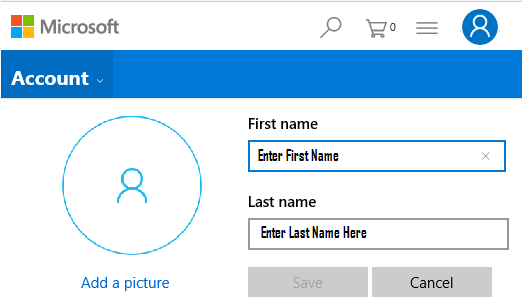
This will open the web browser on your computer and load your Microsoft Account Profile. 3. Navigate to the Accounts Page and click on Edit Name option, located next to your Name (See image below).
- On the next screen, you will be able to change your First Name and Last Name and click on Save.
5. Restart your computer to see if the changes that you have made have synced back to your computer. The next time you login to your computer using Microsoft Account, you should be able to see your New Name. If you do not see the change, you may have to wait for a few hours for the changes to sync to your computer. Also, you need to be aware that changes to your First and Last Name will also be reflected in your online ID and your Microsoft Email Account.
How to Fix “User Profile Cannot be Loaded” Error in Windows 10 How to Change Microsoft Account Password in Windows 10