Most of your Google account data is kept until you delete it, so it is important to ensure that you manage your activity at regular, repeating intervals to keep it private and secure. Today, through this post, we’re going to show you how to automatically delete your Google account data across all Google services.
How to Auto-Delete Your Google Account Data:
Before moving on, first, let’s understand the different categories of information that you can choose to automatically delete from your Google account.
Web & App Activity: It includes Chrome history, voice, and audio recordings, searches and browsing activity on sites, apps, and other Google services.Location History: It includes info about the places you’ve visited.YouTube History: It includes YouTube videos and the things you watched or searched for on YouTube.
Read Also: How To Recover Deleted Files From Google Drive
Delete Web & App Activity From Google Account
Follow the below-listed steps to erase all your web and app data that Google is keeping on you such as the sites you’ve searched for, the games you’re playing, the documents you’ve been saving to Google Drive, and lots more.
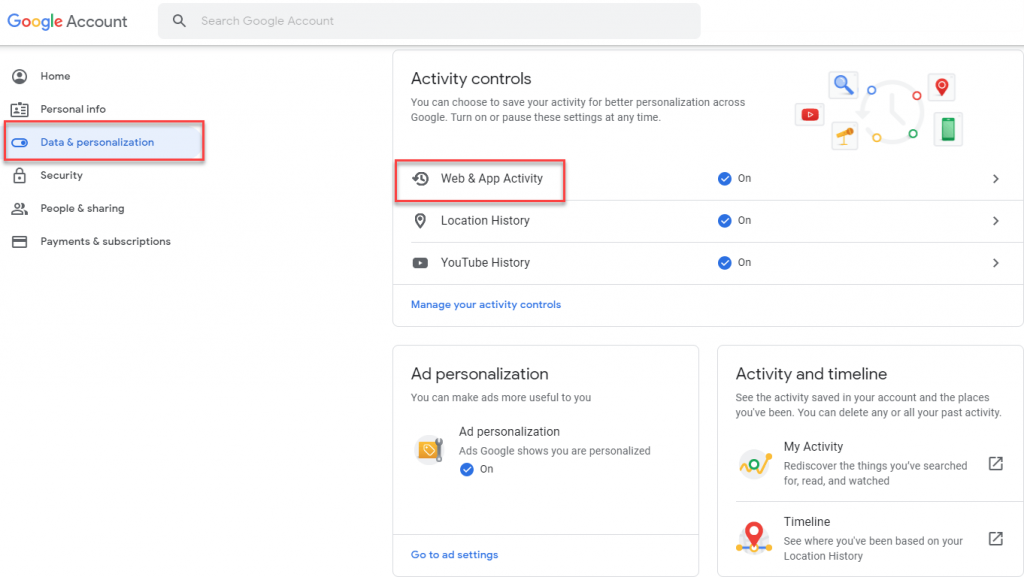
First, you need to sign in to your Google account.Click Data & personalization from the left navigation panel.From the Activity controls section, select Web & App Activity.
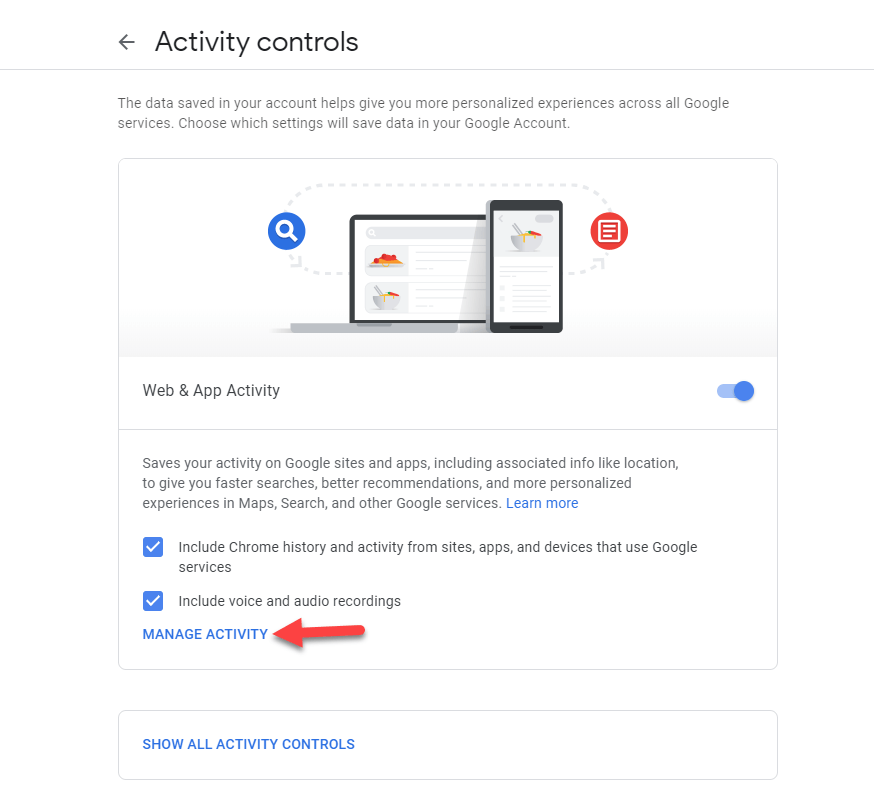
On the next screen, click Manage Activity.
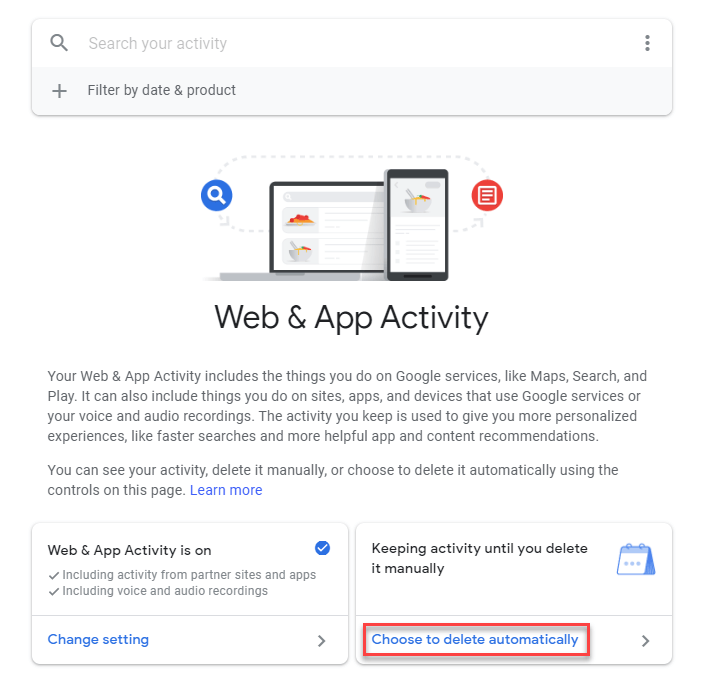
Now, click the button labeled as ‘Choose to delete automatically’.
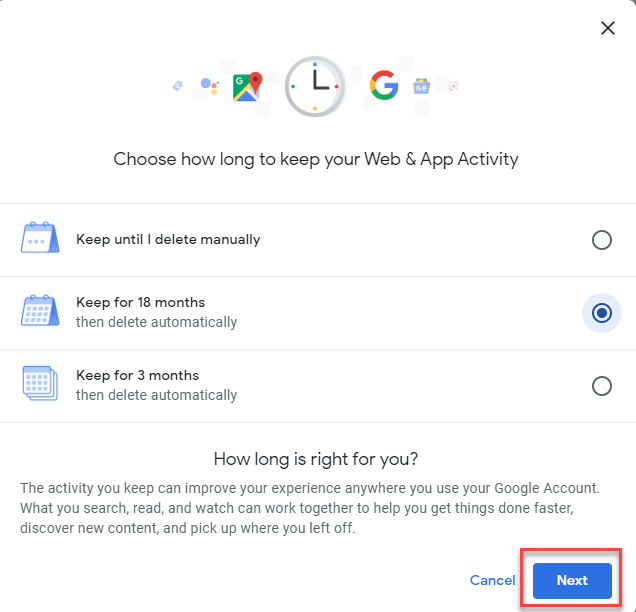
Choose a time limit for how long you want to conserve your Web & App Activity data and click ‘Next’ to confirm your changes.
Delete Location History From Google Account
You can delete Google’s location history or set up automatic deletion for your account using Google Maps Timeline. Here’s how!
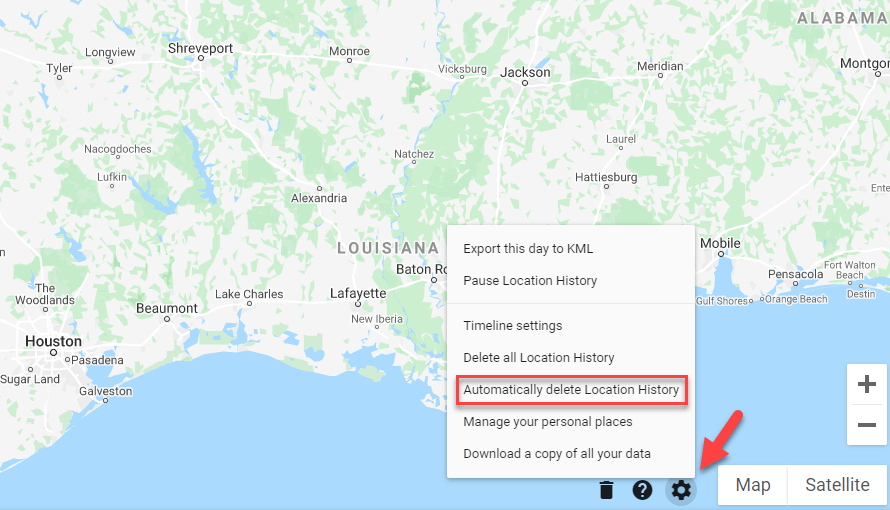
Perform the aforementioned step 1 & step 2 and click Location History, followed by Manage Activity.From your Google Maps Timeline page, click the settings icon > Automatically delete Location History.
Choose the auto-deletion time and click ‘Next’ to save your changes.
Read More: How To Clear Cache in Chrome, Firefox, Safari & IE Browsers
Delete YouTube History From Google Account
If you don’t want Google to keep a record of the things you watched on YouTube, it’s simple to delete that information too. Follow the below steps to get it done:
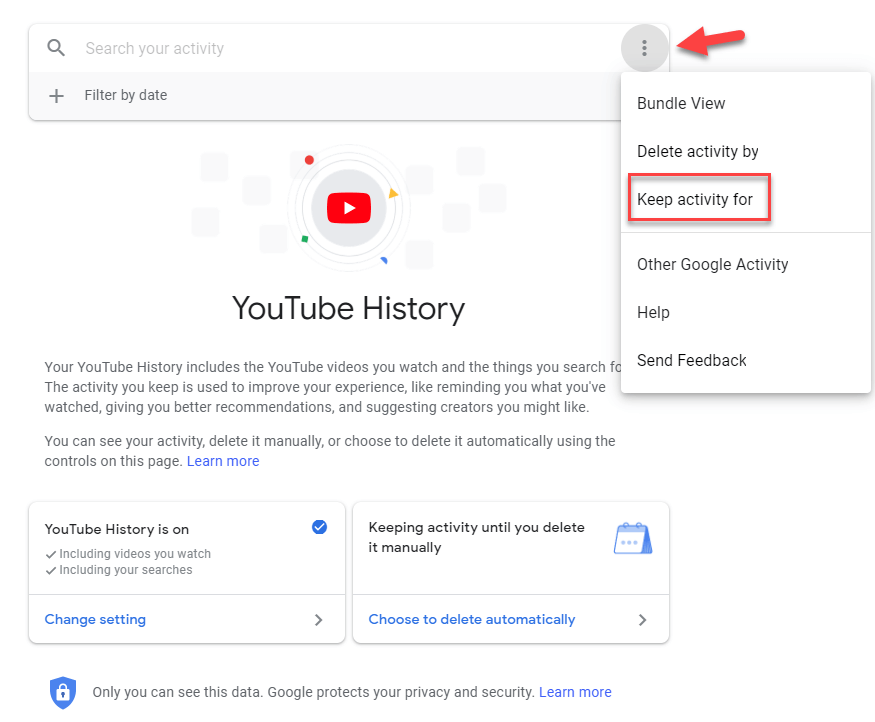
Repeat aforementioned step 1 & step 2 and click YouTube History. followed by Manage Activity.Click the three vertical dots icon at the upper right corner and select the ‘Keep activity for’ option.
Pick a time and click ‘Next’ to erase YouTube history from your Google account.
Note: Even when you delete all data, Google may keep hold of some activity about your use of its apps and services for the entire life of your Google Account. For instance, when you delete a search activity, your Google account will keep a record of the fact that you were looking for something, rather than what you were looking for. In order to completely delete the data, you can simply delete your Google account.
Automatically Delete Your Inactive Google Account
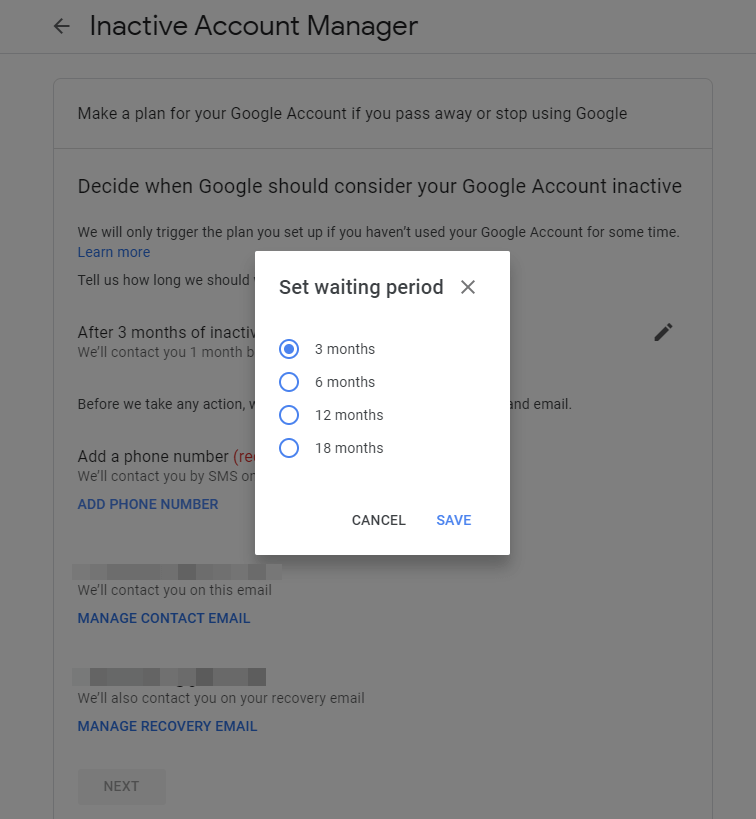
Have you ever wondered what happens to your Google account data when you stop using the account? If you didn’t, let me tell you that all your account data remains on Google storage systems for the rest of your life and even after you pass away. However, the search giant offers an interesting feature called ‘Inactive Account Manager’ that lets you decide when the company should consider your Google account to be inactive and what to do with your info afterward. Now, follow the below-listed steps to set up an Inactive Account Manager to manage your Google account data:
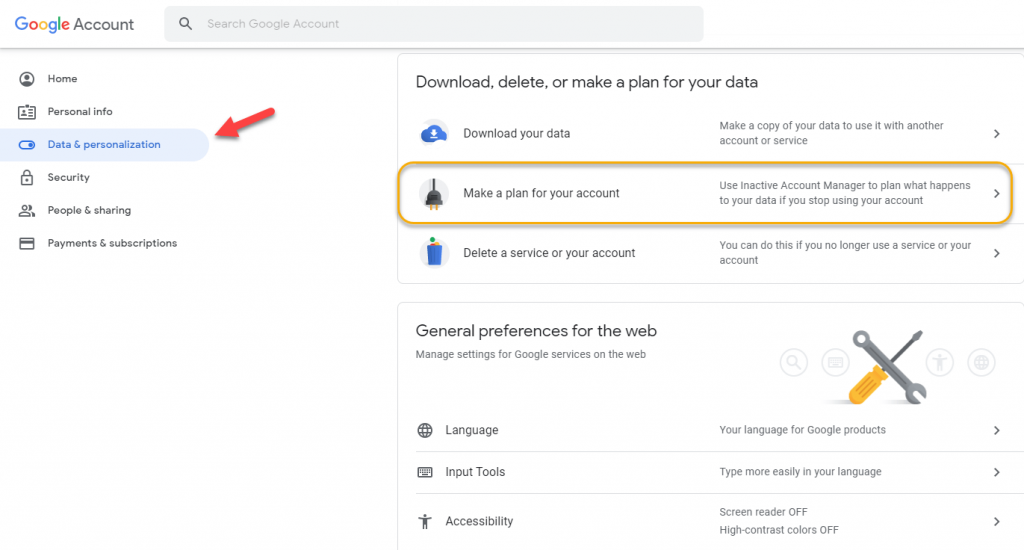
First, sign in to your Google account, select ‘Data & personalization’ and then click the ‘Make a plan for account’ option.
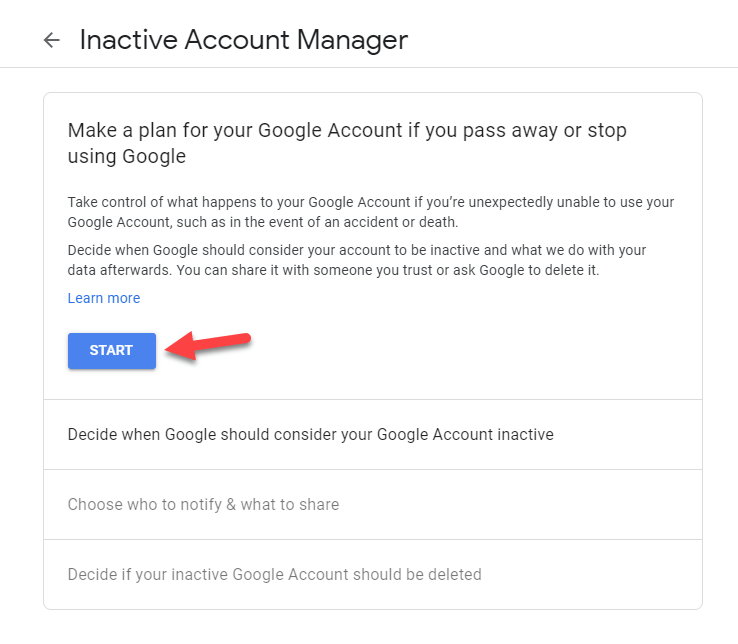
Under the Inactive Account Manager page, click the ‘Start’ button.
On the next page, Google will ask you to set a time period of inactivity for your account. You will also need to verify your phone number and email address – so the company can notify you 1 month before the period expires.
In the next step, you can add up to 10 people as your trusted contacts to notify them about your inactive account. You also have the option to select trusted contacts with whom you want to share all your data.Once done, select the toggle to enable ‘Yes, delete my inactive Google Account’ and then click Review Plan > Confirm Plan to save the changes.
So, this was all folks! This concludes our guide that will give you a clear insight on how to automatically delete your Google account data. We hope these aforementioned steps helped you manage your Google activity in a way that works best for you. If you still have any additional questions or require further assistance regarding the subject, do let us know in the comments section below!
