Windows Update Cannot Currently Check for Updates
Windows Update Cannot Currently Check for Updates pop-up can appear on a Windows 10 computer due to various reasons, ranging from Windows Updates being blocked to corrupted files in Software Distribution Folder.
1. Restart Computer
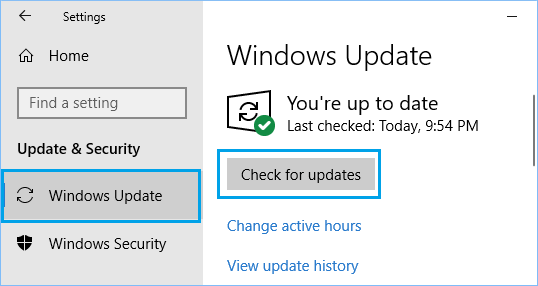
In many cases, the problem can be fixed by Restarting the computer and allowing Windows to install the Update. If Windows does not automatically resume the update, go to Settings > Update & Security > select Windows Update in the left pane and click on Check For Updates button.
2. Disable Antivirus Software
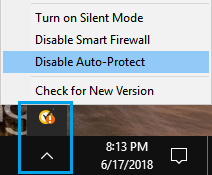
Sometimes, the problem is due to Windows Update being blocked by the Antivirus software installed on your computer. To fix this issue, temporarily disable the Antivirus software on your computer and check for updates again.
You can enable the Antivirus software again on your computer after the update is installed.
3. Run Windows Troubleshooter
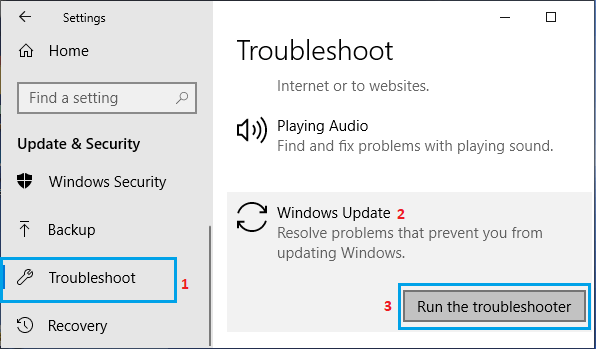
The built-in Troubleshooter in Windows 10 can be trusted to help with Windows Update problem on your computer. Go to Settings > Update & Security > select Troubleshoot in the left-pane. In the right-pane, select Windows Update and click on Run the Troubleshooter button.
If prompted, enter your Admin Password and wait for Windows to find and fix problems related to Windows Update on your computer.
4. Restart Windows Update Service
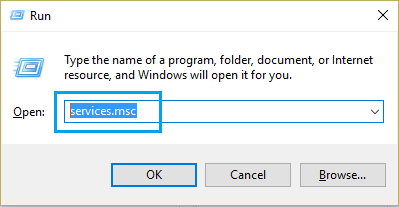
Right-click on the Start button and click on Run. In Run Command Window, type services.msc and click on OK.
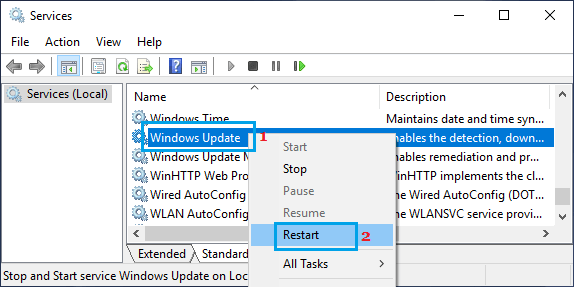
On services screen, right-click on Windows Update and click on Restart option.
After this, check to see if you can install Windows Update on your computer.
5. Clear Software Distribution Folder
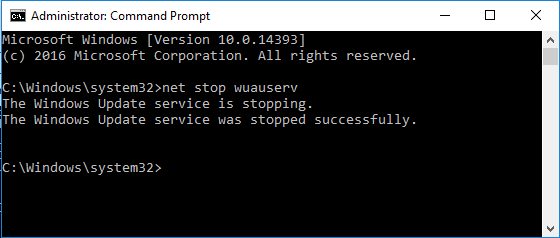
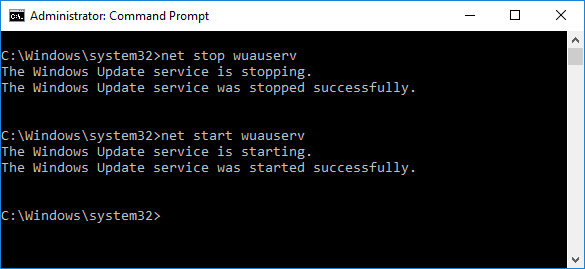
Windows Update problems can occur on a Windows computer due to update files in SoftwareDistribution Folder being corrupted. Open Command Prompt with Admin privileges, type net stop wuauserv and press the Enter key. This command will stop the Windows Update Service on your computer.
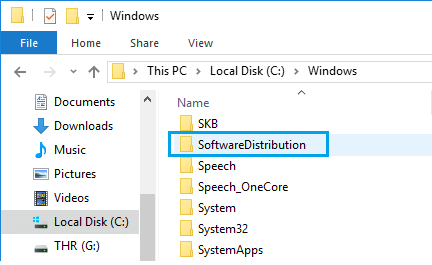
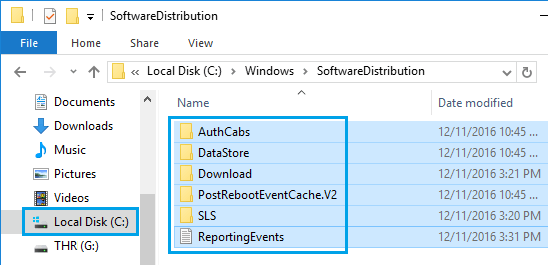
Note: Do not close Command Prompt Window, as it will be required later to Restart Windows Update Service. After stopping Windows Update Service, open File Explorer > navigate to This PC (Or Local Disk (C:)) > Windows and locate SoftwareDistribution Folder.
Note: Just to be on the safe side, copy “SoftwareDistribution” folder to your desktop as a backup. Open SoftwareDistribution Folder > select and Delete all Files located in SoftwareDistribution Folder.
Note: These are temporary files and Windows 10 will create them again from scratch. After deleting Files in SoftwareDistribution folder, type net start wuauserv in Command Prompt Window and press the Enter Key to start Windows Update Service.
After this go to Settings > Update & Security > Windows Update and click on Check for Updates button. Hopefully, this time you should be able to install Updates on your computer.
How to View Installed Updates in Windows 10 How to Uninstall Windows 10 Update
