Windows could not find a Driver for your Network Adapter
Network connectivity error reading “Windows could not find a driver for your network adapter” occurs when Windows 10 is unable to load, locate or interact with the driver software for the Network Adapter installed on your computer. This can happen due to various reasons, ranging from outdated or corrupted device drivers to other reasons.
1. Run Network Adapter Troubleshooter
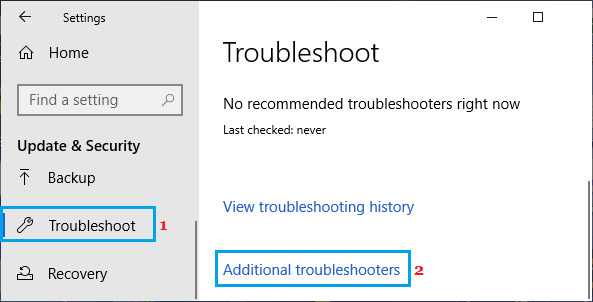
The built-in Network Adapter Troubleshooter in Windows 10 might help you in either fixing this problem or point to a reason for the occurrence of this error on your computer. Go to Settings > Update & Security > select Troubleshoot tab in the left-pane. In the right-pane, click on Additional Troubleshooters.
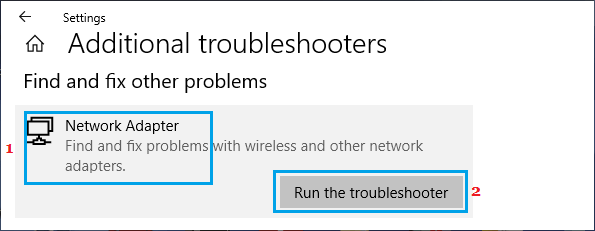
On the next screen, select Network Adapter and click on Run the Troubleshooter.
Follow the on-screen instructions as the Troubleshooter tries to find and fix problems on your computer.
2. Prevent Computer from Turning OFF Network Adapter
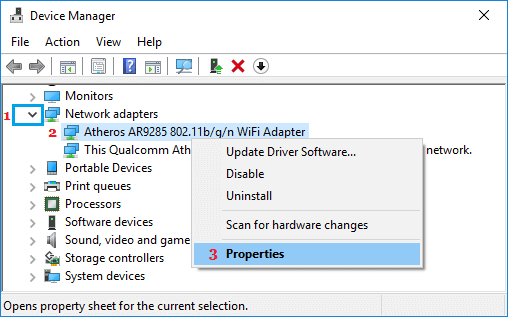
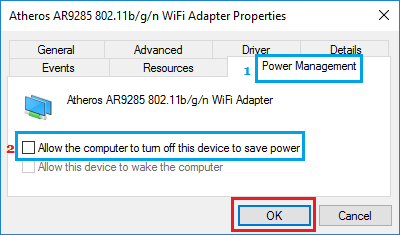
Right-click on the Start button and click on Device Manager. On Device Manger screen, expand Network Adapters entry > right-click on WiFi Adapter and click on Properties.
Tip: In case you see too many entries, look for something that says Network or 802.11b or has Wi-Fi in it. On Properties screen, select the Power Management tab and disable Allow the computer to turn off this device to save power option.
Click on OK to save this setting on your computer. Now your computer won’t be able to Turn OFF the Network Adapter, which should fix the problem on your computer.
3. Update Network Adapter Driver
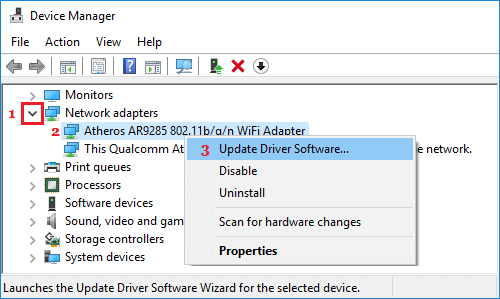
In general, Windows 10 should automatically updates the Network Adapter, but this may not always happen. Right-click on Start button and click on Device Manager. On Device Manger Screen, expand Network Adapters entry > right-click on WiFi Adapter and click on Update Driver Software option.
Tip: If you see multiple entries, look for something that reads Network, 802.11b or has Wi-Fi in it. On the next screen, select Search Automatically for Updated Driver Software option and follow the instructions to install the driver.
4. Reset Network Adapter (Winsock Reset)
Follow the steps below to Reset the Network Adapter on your computer. Open Command Prompt (Admin) > type netsh winsock reset and press the Enter key.
Restart your computer, try to connect to Internet and see if you are still getting Windows could not find a driver for your network adapter error on your computer.
5. Uninstall Wireless Adapter Driver
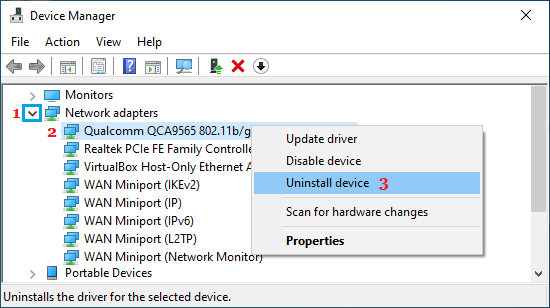
Open Device Manager > On Device Manager screen, expand Network Adapter entry > right-click on the Wireless Adapter and click on Uninstall device option.
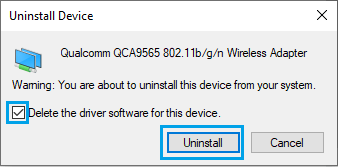
On the confirmation pop-up, check Delete driver software for this device option and click on Uninstall.
Restart your computer and Windows should automatically install the right driver software. Note: In rare cases, Windows may fail to install the right driver. If this happens, manually download the driver software from the manufacturers website and install it on your computer.
How to Clear All Types of Cache in Windows 10 How to Switch Microsoft Account to Local in Windows 10